|
Lens × Block World as Construction Kit by Jay Saul Silver 3. Contributions In part 1 of this section I will talk about the virtues of lenses and blocks, neither of which has the virtues of the other. In the second section I will talk about combining the virtues of both into a single object. Finally, I will provide one method for thinking about and improving existing Construction Kits so that they have the dual lens-block advantage. I’ll go into detailed specifics with the example of a painting kit. I will also define Constructive Lens. Lenses, take magnifying glasses for example, are an amazing tool for inquiry. The entire visible world becomes something worthy of inspection, maybe even investigation, to a curious individual augmented with the use of a magnifying glass. Of course the whole world was already “willing” to be investigated, but the addition of the particular tool, by design, enhances the possibility of the particular action of investigation. Blocks on the other hand, take wooden blocks for example, are an interesting tool for architectural creation, tinkering, reconfiguring a known set of parts. A person augmented with the power of wooden blocks is a person who is highly likely to create towers, maybe even towns, etc. Wooden blocks are great for rearranging. Wooden blocks invite anyone from 1 month to 100 years old to put their hands into the action and start creating and destroying in cycles. But blocks are not a very good “lens” onto all the parts of the world. That is to say, playing with wooden blocks rarely teaches about ladybugs (or fingerprints or table salt). What about magnifying glasses? How likely are they to lead to experience with creation, experience with repurposing? How often do lenses lead to a reordering of the physical world? It doesn’t happen by design, though it may happen by accident. So, when thought of as a tool for education, a wooden block is, by design, made to teach about creative action, and a magnifying glass is, by design, made to encourage investigation of the world. What if we put them both together? Many educators would agree that both lenses and blocks are great ways of learning. And so they are often employed... separately. But what is it that happens when you combine the two into a tightly coupled pair? I call this a Constructive Lens. What does a “Constructive Lens” do? One interpretation is that when you tightly couple the acts of creation and exploration (wooden blocks and magnifying glasses) you get people investigating the properties of the everyday world (like a magnifying glass) and you get people reconfiguring and tinkering (like wooden blocks), and that when you do them at the same time, you might get people engaged in the process of re-investigating and reconfiguring the everyday world in tightly coupled iterations. This “Constructive Lens” is 2 things at once. It is a lens, because it is a world view. At the same time it is a way of acting because the world view enables an activity of appropriation and designation of meaning. The Constructive Lens inherently diminishes the strength of the idea that there is only one existing order in the world simply by bringing to light the possible existence of infinitely many possible orders.
While a high bar indeed, creating a situation in which people take objects from the everyday world, analyze the objects’ properties so as to re-see their workings, and then synthesize something new by combining the objects together or casting newly designated purpose on their use, is an exciting prospect. This means that people are re-seeing the world as repurposable, thinking of it as malleable, and acting in accordance. Another way to say this is that the Constructive Lens will encourage the process of repurposing the world, thus creating the space for the thought that the world is malleable, and seeing the world in accordance. The two statements are one in the same. If there is a Constructive Lens that works this way, one might even say the actions taken by the person using it bestow a confidence and sense of agency, create a fertile ground for expression, and even a sense of empowerment. There are many modern Construction Kits, such as: paint sets or electronics kits. Modern Construction Kits often come in a box with everything you need so that you can get started right away creating. There are many genres and subgenres of Construction Kits within various fixed media. For any expressive medium (gardening, sculpting, 3d printing, computer programming) one can imagine the design of several kits to support the activity. For a given kit, is there a way to open up the box a bit so that the kit leads not only to creative action within the confines of the kit parts, but so that the kit also becomes a sort of lens onto the world as potential creative pieces or as a potential creative space? Let’s define Construction Kit, not for the purposes of an absolute taxonomy, but for the purposes of scaffolding the generative process of turning kits inside out so that they become lenses onto the world (while still being kits for creative action). Let’s say that Construction Kits have 3 components: 1) Parts (especially loose parts) 2) Tools (for combining and reconfiguring loose parts) 3) Stage (a substrate or place where the creative action is situated and may live on) (note: not all kits will have all 3 parts, and not all kits have to fit nicely into this framework) A strategy for turning a “regular” Construction Kit into a “World as Construction Kit” situation might be to choose one component of the kit and remove it from the kit. Instead the creator must look to the everyday environment to find that component. Assuming the construction kit is expressive enough, then the user is motivated to make something with the kit, but by removing one of the components of the kit, some of that motivation to express is directed toward the everyday world as the user now goes on a sort of hunt for what they can use. In this way, the user is directed toward the everyday world and begins looking around with an eye for “how can I use this item for such and such a purpose” as they scan the environment looking from thing to thing. Take a painting kit for example. It might consist of: 1) Paint (loose part) 2) Brush (tool) 3) Canvas (stage) But what if there is no paint? Perhaps the creator can be encouraged to scavenge paint from crushed berries, or from objects (like rainbow sprinkles or small pebbles) mixed with glue. In this scenario, if the creators eye scans across a berry (or a balloon, or some cheerios, or a blade of grass, etc.), the creator asks herself, “How could I see this berry (or cheerios etc.) as if it were paint?” Then, having had experience with berries (or cheerios etc.) the idea of using it as paint either snaps into place or doesn’t or somewhere in between. The creator is catalyzed to reconsider the usages of their everyday world in particularly constrained ways, like “How could this be used as paint?” In doing so, the creator has to strip out the normal meaning of what they think they know, “This is a berry, berries are for eating,” then hold that berry, now stripped of its supposed “known” purpose, in a new light, a light of paintability. (Cheerios, by the way make a great, albeit chunky style, paint when combined with glue). What if there is no brush? Perhaps the idea could arise to boil spaghetti and paint with it, or grab a toy race car and use its four wheels as brushes while driving the car around the canvas, or stamp leaf patterns. In this scenario, the creator once again has her attention directed toward the everyday world to reconsider what she thinks she knows about common objects. As she scans her couch pillows, her cat’s tail, a light bulb, and a gallon of milk, each is considered as if it were a paintbrush, and what it would mean to think of each object as a paintbrush. This is the “Constructive Lens” effect: to look at what we already know and consider it for new uses, consider its properties and affordances, and how those affordances might be beneficial, interesting, or surprising in a new context, different from the originally designated or generally agreed upon purpose. What if there is no canvas? This seems to point to the field of graffiti or sand dollar art. Buildings or sea creatures become the canvas. In this scenario, the creator gets to reconsider objects as a medium that carries a painted picture or holds paint as a substrate. What does it mean to paint a picture on a car vs. a building vs. painting directly on water? Is that even possible? How? What would happen next? Can you paint on air? On rain? Can you paint on a rainbow? What about the head of a pin? What about on human skin or bones or a flower or a porcupine? While these types of questions could be asked and practiced as an exercise in and of themselves, it is so much more powerful and meaningful to engage with them in the context of an expressive project in which these questions are an inherent part. The point is not to prove that any of these art genres are particularly new, though I think it’s rare that people try to paint pictures on porcupines, but rather to evoke the idea that perhaps this framework is a generative way to think of new media art and even new types of Construction Kits that are Constructive Lenses onto the world: A kit that catalyzes querying everyday objects for their paint-properties and then using those objects as paint to create an expression, is a kind of Constructive Lens for “World as Paint.” Let’s reconsider the same paint kit, but in the additional light of digital tools:
Table 3.1. Construction Kit Components Concretized Through a Particular Painting Kit Example As described earlier, I/O Brush [Ryokai +, Computer Human Interaction 2004, I/O Brush: Drawing with Everyday Objects as Ink]. is a digital brush system in which paint is sampled from the everyday world around you. When using I/O brush, you can’t even start until you take a picture of something with the brush (“sampling a digital paint swatch from the world”). There is no color picker in the program. You simply have to look to the world and touch the brush to something to get the texture and color of an object in your environment so you can begin painting. Not only do you “have to” do this, but it is quite exciting and expressive to take the texture of an eyeball and begin to make a drawing out of it. Once that desire is created, the desire to look around and see the texture and color of everyday objects as useful or not useful for the painting you wish to create, then in the human mind a sort of “lens” forms when looking around at things. The lens is not literal, but instead is a way of seeing. Specifically it’s a way of seeing the world for its component parts, in this case color and texture, and how those component parts could be used to make something, in this case a painting. This is a specific type of inquiry that is not inquiry into the working of machinery, but specifically inquiry into what can be created out of the everyday world. A sort of creative inquiry. The person starts to see the World as Paint or more generically World as Loose Part, which is a form of World as Construction Kit. Glowdoodle (Rosenbaum, Creativity and Cognition 2009, Glowdoodle: A Medium for Expressive Inquiry) is one example of a light-drawing system in which everyday objects can be used as paintbrushes. It allows you to wave objects in front of the webcam and trails of those objects appear on the screen if they reflect or emit light or color. The creator thinks, “What kind of a resulting brush stroke will this LED toy (or this smartphone screen, or this sunflower) have when waived across the scene?” The creator imagines each item, or perhaps tries without imagining too much, depending on the person, as a digital brush. In doing so the person starts to break down the world into types of object reflectance and light emission, even if not explicitly thought of with that vocabulary, to evaluate the usefulness of each T-Shirt, paper airplane, and Starburst wrapper as digital paint brushes. The person starts to see the world as paintbrush (or more generically, world as tool). The L.A.S.E.R. Tag project [Graffiti Research Lab, 2006, L.A.S.E.R. Tag] is a digital graffiti system that encourages you to look around the world and consider any solid object as a potential canvas for drawing on digitally. What if I laser graffiti on the moon? What about a foggy night? What about my body as a canvas for laser graffiti? The lens of digital graffiti, like the lens of old fashioned graffiti, is a lens in the mind of the creator that makes the creator look to the environment with an eye for “How would it be meaningful to transform this item by painting on it?” “How will this item take to the digital ‘paint’ based on its properties?” “What is this tube of toothpaste as a canvas for laser graffiti? What about this waterfall?” The person begins to see the World as Canvas (or more generically, world as substrate or world as container). Whether of the form new media art or traditional crafting, separating a construction kit out into its component parts and then systematically removing a component and asking “what if we direct the user’s attention to scavenging that component from the world?” can be a way to generate new “World as Construction Kits.” Ultimately, “World as Construction Kit” is a state of mind that represents a world view. II. Design 4. Constructive Lenses in the World This section will start by taking a traditional kit, and “opening” it to explore the specific differences between a Constructive Lens and a traditional construction kit. Then we will try to define what is different specifically and give terms to those differences. Finally, we’ll take a look at Constructive Lenses that already exist in the world. Open LEGO -- Opening a Traditional Construction Kit What if some traditional LEGO kits came with a special set of LEGO bricks that were made just for attaching to other objects around them? Ideally there would be a few LEGO bricks that could attach to each type of material in both the man-made and natural environments. Imagine the following “Open LEGO” scenarios: ● Suction LEGO -- Some LEGO bricks with a suction cup for attaching to very smooth surfaces like glass or polished materials “When I was done making the birdhouse I suction cupped it to the outside of my window, and a real family of birds moved in” ● Eyelet LEGO -- Some LEGO bricks with an eyelet so that it can have string looped through it to be tied to things “I made a beautiful flower bud, and when I was done I looped it through my necklace chain and wore it as a pendant. Afterwards, I started a tradition of decorating the tree in the front yard with my LEGO creations” ● Floatation LEGO -- Some LEGO bricks with floatation built in so that objects can be built on liquid surfaces “I built a mini rowboat and put a ladybug inside it to pretend she was lost out at sea. We attached the row boat to a LEGO floatation platform and pushed it into the pond, and we elaborated sagas of the misadventures when the wind would blow it this way or that...” ● Snap-In LEGO -- Some LEGO bricks with velcro, button holes, or snaps so that they could attach to other objects that have those receivers “I’ve been playing hacky sack for a while, and I thought that it would be great to have a little ‘scooper’ on the top of my velcro shoes, so I built one and attached it with the velcro LEGO piece. I’ve been modifying my design each day after hacky sacking.” ● Sticky LEGO -- Some LEGO bricks with very sticky tape for attaching to somewhat smooth surfaces like weathered wood or rusting metal, or leaves “I am making a little teepee out of sticks and leaves, and I wanted to add some windows, so I used the tapable LEGO to help hold my windows in place and bind it to the sticks.” ● Magnet LEGO -- Some LEGO bricks with magnets to attach to fridges or other toys that contain magnets “I like to make marble machines out of LEGO bricks, and I stick the machines to my fridge with magnets which makes them easy to move around and reposition. The ‘marbles’ are metal ball bearings, so I can also use the magnet pieces to alter the course of the ball bearing. When I play in the bathtub, my marble machine becomes a water machine, because I noticed that bathtubs are magnetic too. Sometimes I build with my LEGO set and my magnet kit at the same time because they are inter-operable.” ● Other Kit LEGO -- Some LEGO bricks that have little attachments for Tinker Toys, compatible K’nex hookups, and 3 sizes of holes to press-fit twigs. “Today I gathered up some fallen branches, and I made a dome on my tree fort with a hybrid of K’nex, LEGO bricks, and twigs.” ● Visual Media LEGO -- Some LEGO bricks with a clear plastic pouch that can hold a printed or drawn image on one side and can be drawn on with markers or pencil on the other side. “I made a mask in the shape of a gator and then drew teeth and scales on with a pencil.”
and on and on like this.....
LEGO bricks as they are now can and always have been repurposed and combined in all kinds of situations, but it has been despite, not because of, their design. In this example the traditional LEGO construction kit is composed of different colored loose parts called LEGO bricks. Because the LEGO bricks are press fit (the fasteners are built into the top and bottom of each LEGO), there is no tool other than the human hands that are needed to perform the basic construction operation. LEGO kits often but not always come with a substrate in the form of a big LEGO sheet to attach your creation, and the design of this sheet is not generic or implicationless: it implies that the creation should sit on top of something flat, like on a floor, shelf, or table. In the example, we opened the loose parts of the construction kit with the “Other Kit LEGO” brick. We opened the substrate with the “Flotation LEGO” brick. In doing so we turn the LEGO kit into a lens onto the everyday world for considering how the LEGO kit might interact with and be co-constructed with the everyday world. Open Construction Kits What is Open?What do I mean by open? To open a construction kit is: To redesign a construction kit so that one of its components (parts, tools, or substrate) is left unspecified in a way that suggests it should be drawn from the world around you. I mean to operationalize the idea of “World as a ______.” For example, one way to “open the painting kit” is to “invite the artist to appropriate the properties of everyday objects as the paint” (as in I/O brush). A closed construction kit is one where the loose parts, tools, and substrate are fixed and unchangeable, at least by design (anything is changeable if you try hard enough). But something doesn’t sit right about that definition. Take a basic painting kit for example. It seems quite open ended, as we can paint pictures of anything even if it’s always with the same paint, brush, and canvas. There is one more piece to the puzzle of open activities using open construction kits. Take for example a typical construction process. There are some people who came to construct something: where did they come from and who compelled them to do so (Prologue)? There is some situation or theme, or goal in which the construction is carried out (Beginning). Then the materials are gathered and acted upon with tools (Middle), a final project is converged upon (End), and then that final project is placed somewhere (Epilogue). 1) Prologue - People: Recruitment mechanism, Theme, Setting 2) Beginning - Loose Materials 3) MIddle - Tools 4) End - Final Project crystalised 5) Epilogue - Placement or Afterlife of Project This is very rough because it ignores all the iterative loops and complex processes involved with creative action and activity conception. But it serves our purposes. The reason a normal painting kit seems so open-ended is because it is exactly that. The end product is completely open (unless there are instructions guiding otherwise). It’s only the loose parts (the beginning) and materials (the middle) and the substrate (the epilogue) that are closed. That is to say that traditional painting is open-ended (step number 4), close-beginninged (step 2), close-middled (step number 3), and close-epilogued (step number 5). That is, unless you are in a class where everyone is to paint the same subject, which it would be close-ended. Now in this case, of course, everyone’s painting will turn out a bit different, but this is not called open-ended. But the interesting thing is: what does it mean for a project to be open in a way other than open-ended? Let’s take painting as an example. If a painting project is open epilogued but closed elsewhere else, then one example would be: Everyone will start in the same room with a bowl of fruit on the table. Everyone will get a brush and a set of paint colors and a piece of paper with glue that is meant to be affixed to something in the world when completed. Everyone will paint the bowl of fruit on their canvas. Then when they are done they will go out into the world or into their house or onto their bodies and affix their painting somewhere. You might think of that project as open-ended as it is indeed a project with different outcomes. And that would be accurate. But the project idea was generated via thinking of it as open-epilogued, and that is the power of the technique of opening a component of a construction kit. Note again that open-epilogued painting projects often end up feeling like graffiti (or tattoo projects if affixed to a person’s body). Banksy, the most famous modern graffiti artist, does his graffiti in just that way: first create the art, then roll it out on to building street or facade. But tattoo is definitely distinct from graffiti in my mind. Importing and ExportingMany now accept that facts and knowledge alone are not a satisfactory outcome of an excellent learning process, and that we must “learn how to learn” or learn to “be creative.” To make creative space, many activities (including standard/basic LEGO construction in their older original form) are open ended. That is to say, at the end of playing with a basic LEGO set, each person will have a different finished product, if they have a product at all. (This isn’t always true of LEGO kits, as the majority of modern LEGO kits have prescribed building patterns, like a particular Star Wars spaceship). This “Open Endedness” is a form of open, and is much more likely to connect to something that the creator finds personally meaningful than if the end product is prescribed. What you see in the Open LEGO example above is a case for LEGO projects to be -- by design -- open-beginninged, open-middled, and open-epilogued.
Importing (or “open-beginninged” and “open-middled”)To the LEGO Company’s credit they have a nice concept of System and Play, which refers to the LEGO Company’s policy of making parts that mix and match among themselves using a standard protocol for connection. For LEGO sets to be open-middled, they need to be able to mix, match, and connect with the material world outside of the LEGO system, like in the Other Kit LEGO example. This type of combinability that provides an openness to the beginning or middle of the building process could be referred to as importing. Importing happens when the material world can be brought into the kit world to act on or be combined with the kit’s loose parts. Most modern art software applications allow the creator to import existing images into their work to remix, collage, or mashup.
Exporting (or “open-epilogued”)Floatation LEGO says to creators, “When you’re done building something, maybe you should take the final product and put it in some water.” Like importing, there is a certain connection that is being made to the creator’s everyday life. Another, perhaps more powerful, type of exporting is to share the finished product with friends. Since the advent of YouTube, the average video has had a much more vibrant epilogue to its creation story. The final video project can be uploaded to YouTube, which is probably already part of the creator’s everyday life, and then many types of social interactions can begin around the video. (Note: The document you’re reading was created with a word processing toolkit that allows for exporting to PDF for easier sharing). Importing and exporting is really just another way of talking about whether a given toolkit is interoperable with various parts of the world. There are formats, languages, protocols, and other ways of aligning with standards so that a toolkit can incorporate or be incorporated into different parts of everyday life. In the software world this is called “API” and is one of the most important aspects of a modern webified application. Beyond interchangeability, instructions and positioning have a big effect on whether something is exportable or importable. Permission changes the mindset. Some Existing Constructive Lenses Non-Digital Constructive Lenses Already in Existence Out in the World MakeDo MakeDo is a set of tools
Figure 4.1. MakeDo’s Overview of Parts. (Images reproduced from mymakedo.com)Parent Hacks says "Makedo hits the jackpot with early independence and open ended play." And it is true that it is open-ended, and it also happens to be open beginninged in that the materials which you use are not specified. Further it’s not completely open beginninged in that it has some suggestions and most of its examples focus on cardboard. However even cardboard comes from many sources and in many forms. Here is an example of how MakeDo would be used:
Figure 4.2. MakeDo’s four steps: Find, Create, Play, Share. (Images reproduced from www.mymakedo.com)Notice the attention to the beginning with an explicit attempt to encourage the bricolage and open beginninged-ness by showing what appears to be a random collection of junk all of which can be operated on using MakeDo. These instructional materials are key to support the open beginninged-ness and “World as Construction Kit-ness” of MakeDo. If the kit shipped with cardboard and didn’t encourage bricolage in the support materials and instructions, then despite its potential as an open construction kit, it may not realize its potential as such. Notice the attention to epilogue in the “Share” step. Though I wouldn’t say they have gone the extra step to encourage sharing in multiple substrates, I would say they stopped short of making the kit explicitly open epilogued. Note the language around “Play” and “Create”. While these are communicative and typical linguistic usages, they point to an important mistake in thinking about play patterns. The “create” step is extremely playful and just as an important part of true play as the “play” step. In unhindered child play patterns children will make, bend, and break the rules of the game and the physical components of the game all as part of the game play. This type of game play in fact develops the same part of the brain that is used in adult civic and family life for - Setting agendas - Stepping back and focusing in on project goals and ways of engaging with a project - Structuring relationships in group dynamics - Negotiating and deciding on goals and norms - Determining the very experiences that life will make up Edible Seed Bomb Kit
Figure 4.3. Edible Seed Bomb Kit Screenshot. Image reproduced from visualingual.comThis seed-bombing kit is closed-beginninged with the seeds already provided to you. The form factor is explicitly open-epilogued as it is a throwable ball with proteins for the seeds and the seeds inside the ball. The seeds are chosen just so that they will likely grow in a variety of climates and soil conditions thus making them explicitly useful for growing in multiple substrates, which makes their epilogue or “garden canvas” open. They are missing an opportunity to have been open-middled. Since they don’t provide any tools for launching the seed bombs into the world, they could have provided instructions that people should make or find tools or mechanisms by which to launch their seed bombs using strings, slingshots, ramps, cars and bikes, secret holes in pockets of pants, etc. While this kit has the potential to be open-middled, it missed the chance to operationalize that potential with some simple instructions or examples, making it less likely to happen, or at the very least making it implicit instead of an explicit design parameter. Interestingly, note that the epilogue could be considered split: open in the first half of the epilogue as to the substrate of where the garden grows, and then closed again in the second half where the kit suggests picking the edible plants and cooking them according to a recipe book. Using the “open construction kits” framework, the makers of this tool could consider whether their recipes could involve mixing in other ingredients that aren’t explicitly listed, or they could consider under what circumstances the dinners made with the recipes could be served, thus giving new chances for openness and creativity. The closedness of the second half of the epilogue of this kit is not problematic, it is good to have open and closed components of the kit. And it is good to be aware of these choices, as we live in a world that has lost balance with open parts of play. Digital Constructive Lenses co-created by Myself and Eric Rosenbaum● Twinkle [Silver & Rosenbaum, Tangible Embedded Interaction 2010, Twinkle: Programming with Color] Video at: TwinkleVid.notlong.com Compose 2D musical compositions with colored objects or colored markers. Then play them back by tracing them with a color sensor wand. Twinkle allows people to think of the world (objects with colors) as a musical composition, and rearrange that world to compose one’s own compositions. ● Singing Fingers [Rosenbaum & Silver, Interaction Design with Children 2010, Singing Fingers: Fingerpainting with Sound] Video at: SingingFingers.com A way of finger painting with sound, and then tracing the painting to get the sound back out as if scratching on a record. Singing Fingers uses a touch screen interface to convert sound into color and then back into sound again. Singing Fingers catalyzes people to think of the world (the sounds objects and voices can make) as paint and as components of a musical drawing. ● Color Code [Silver & Rosenbaum, Tangible Embedded Interaction 2010, Twinkle: Programming with Color] Video at: ColorCodeVid.notlong.com Color Code is a platformization of the concepts in Twinkle in that instead of producing sounds from colors, any computer action can be taken based on the color of an everyday object. In this way, everyday objects can be viewed as musical compositions, game controllers, or even computer instructions. Color Code catalyzes people to think of the world (the hues and shapes of objects) as components to interactive video games and interactive scenes. ● Drawdio [Silver, Creativity and Cognition 2009, Nature as interface: MacGyver'ing and Martha-Stewart'ing interactivity with trees, pencils, grandpa, even the kitchen sink] Video at: Drawdio.com A circuit that lets people hook up everyday objects to turn them into musical instruments. A simple 555 timer converts electrical resistance to audible sounds. (Note: There are several Drawdio products on the market, so when I say “Drawdio” in this thesis I am referring to what is commercially referred to as “Drawdio Fun Pack” which is a pre-soldered circuit with 2 alligator clips that is ready for the creator to start using to repurpose objects as soon as it comes out of the box.) Drawdio catalyzes people to think of the world (the analog electrical conductivity of an object between certain attachment points and the actuation of that conductivity by moving the objects through space) as a musical instrument. ● Makey Makey [Silver & Rosenbaum, Tangible Embedded Interaction 2012, Makey Makey: Improvising Tangible and Nature-Based User Interfaces] Video at: MakeyMakey.com Makey Makey is a digital-computation-platformization of the concepts in Drawdio in that instead of producing sounds from electrical resistance, any computer action can be taken based on the electrical resistance of an everyday object. Makey Makey lets you hook up everyday objects as if they were a keyboard or mouse to control software on your PC running in the OS or on the web. Makey Makey catalyzes people to think of the world (the digital conductive or insulative on/off connectedness of objects) as a user interface to a modern computer. For the purposes of going deep and making a clear point, the thesis will focus in particular on two tools, Drawdio and Makey Makey. These two tools will be covered in more depth in the next section since they are the focus of this thesis. 5. Drawdio Genesis This chapter and the next chapter approach the understanding of the Constructive Lens through a design exploration of two new Constructive Lenses. I (along with Eric Rosenbaum) have developed several tools which fit the pattern of what I have been calling a Constructive Lens, as mentioned in the last chapter. How did these come into being and what were the circumstances and influences? I will explore Drawdio in this chapter and Makey Makey in the next chapter as examples. As mentioned previously in Background, I had been working with the concepts of sensor inputs and actuator outputs and had decided to try to simplify the combinations to something less flexible to look for some more creative action. I was sent on a mission to Drishya, a slum school in India headed by Geetha Narayanan. Geetha had agreed with us that the goal for the visit would be nature sensing, which fit right in with my interests at the time. I stopped in Paris to join up with Evelyn, another member of the team, and there I spent some crucial time with Jean Baptiste LaBrune, who would later become a postdoc in the Media Lab. Jean Baptiste, also known as J.B., Evelyn, and I toured around Paris for a couple days thinking about nature and sensing. We visited some museums with green walls growing on the side of the building: a vertical living garden built into a building wall. We visited some hacker spaces and set up some sensor experiments there with PicoCrickets, Scratch, and the sensing of leaves and water. J.B. showed me two very interesting incarnations of a sensor-actuator pair which only 5 years later would I realize were influential. The pair was a solar panel and a piezo. If you hook a solar panel to a piezo, you can see the piezo vibrate and hear it buzz when enough light, especially direct sunlight, falls on the solar panel. J.B. incidentally showed me two things he has made with this combo: 1) A “robot” or “little figurine” with a solar panel on the chest and piezos incorporated in such a way that when light fell on the solar panel the little figurine would begin to move by vibrating and slowly “walking” ala vibrobot. Thus when placed near a window, as the sun traced out a patch of light on the ground throughout the day, the “robot” would walk out of the way of the sun patch because upon the sun patch falling on it, it would begin to move until no longer illuminated. 2) A stick the size of a broom handle with 5 solar panel / piezo pairs glued to it in a straight line. They all buzz intermittently depending on whether strong light is falling on each solar panel at that moment. And, if you twirl it around, especially near a window, the ambient light falls on different parts of the stick in different amounts in changing ways over time and interesting sound patterns emerge. I don’t know how much J.B. connects those two incarnations, or whether he knows they influenced my design in the future. I only recently become consciously aware of the connection when writing this thesis. I want to point out the importance of the experience in Paris with Evelyn and J.B. Evelyn played a very supportive artistic role of accepting my ideas unconditionally and riffing with me off them. J.B. played a role of expanding my ideas and making me think anything was possible as well as showing me around various environments and materials to make me think. This type of adventure-research and co-stoked-ness is important to making breakthroughs as it creates a safe and stimulated space to think big thoughts.
Figure 5.1. Study of plants as part of urban nature in Paris. Images in Figures 5.1 through 5.8 were taken interchangeably by myself and Jean-Baptiste Labrune.The left and middle show two sides of the same scene, a study of plants with a macro lens at a museum. On the right I am pondering a vertical green wall at a museum. The greenery behind me is actually the side of a building permeated completely with plants by an artist.
Figure 5.2. Left: Closeup study of the texture and composition of the non-living parts in various places sidewalk in Paris. Right: Study and consideration of a set of plants encaging a generator, then a set of metal bars encaging the plants, then that nested set of encagements forming a “C” shape with me inside partially encaged.During our study of the city’s cracks and crevices, and urban nature, we were intrigued to find plants in a cage, which upon investigation seemed to have been used to hide a generator, then the cage used to protect people from getting into the generator. Next, at a hacker space in Paris, using several sensor boards, we began to study some of the plant and nature samples
Figure 5.3. A Scratch Sensor board plugged in up front, with 3 other sensor boards behind it.
Figure 5.4. Scratch board with leaf measuring resistance; note early presence of bananas which later became important in Makey Makey.
Figure 5.5. The setup at the hackerspace. Lots of sensors, lots of crafts, and a room, with J.B., Evelyn, and myself.
Figure 5.6. The Scratch sensor board readout on a laptop.
Figure 5.7. Pouring water from one bin to another while measuring electrical resistance as a graph over time as shown on the screen in the background.
Figure 5.8. Evelyn playfully working, working playfully.In these images above you can see Evelyn, a previous grad student in Lifelong Kindergarten working on the sensors with us (right) being playful with the sensors (middle) and what happens when she finds a stage prop lobster claw in the middle of hacking (left). The reason I include the picture of the lobster claw attack is to show the mood during this phase of the exploration which was explosive and playful, like kids on an adventure. With these ideas fresh in my mind off we went to India (Evelyn and I). I, along with various collaborators on Geetha’s team, and members of Lifelong Kindergarten, were running Scratch workshops at a slum school in India called Drishya. Specifically we were focusing on nature sensors (water, plants, wind, sun, etc.) + Scratch. We showed the Drishya faculty and students some of the experiments we had done with the Scratch board and sensors that could measure nature.
Figure 5.9. Testing out the measurement of “nature” with Drishya facilitators using the Scratch sensor boardI was teaching myself how to solder and how to hack analog electronics. One day we were playing with PicoCrickets and had them hooked up to convert electrical resistance to sound. This was not the first time someone had hooked something up this way. But something was starting to emerge in watching the way these particular curious children reacted to “listening” to resistance, and here was a certain creative space opened up by my previous experiences with Camera for the Invisible plus the recent trip to Paris where we had worked with nature and sensors and urban exploration. Later that day we played with the PicoCricket as a resistance-to-sound input/output pair:
Figure 5.10. Left. Listening to the sound of the resistance of an apple with a PicoCricket. Right. PicoCricket resistance-to-sound measuring dirt.
Figure 5.11. Pico Cricket resistance-to-sound measuring rubber or plastic bicycle grip
Figure 5.12. PicoCricket resistance-to-sound measuring skin on headThat afternoon we went to Sadar Patrappa Road (S.P. Road) where all the electronics parts supplies stores are located. I bought a full electronics kit from 3 different stores including a hack saw, solderless and solder breadboards, resistor capacitor and potentiometer packs, LEDs, batteries, connectors and wires, and anything else you need to do basic electronics. Then we went to Om Electronics, shown on the map below:
Figure 5.13. Where I bought the harmonium circuit is marked by a pin and the area around is where you can buy all sorts of electronics.Here they had several “kits” to follow instructions and build certain projects. I bought a heartbeat detector and a “Harmonium Circuit”, which was a piano circuit (harmonium is a more prominent version of a piano in India, although it is reed based). Back at home I started soldering. I worked into the night until about 3am. I had a stack of metal bowls as the mother of the family downstairs would bring me vegetarian meals in metallic bowls that stack on top of each other as is common in India. I didn’t have good lighting and I have bad eyes, but I did manage to get the harmonium circuit soldered and working (figure below). The circuit worked by connecting a metal wand from “ground” to any of a number of points along a resistor ladder. The higher in the ladder the more resistance was measured and thus the lower the pitch the harmonium circuit would make through its speaker. Each point in the resistor ladder was connected to a metallic pad that the wand could land on and connect the circuit. At one point I spilled the stack of metallic bowls on the kitchen table where I was soldering (note to future people: solder is toxic with lead, don’t solder on the kitchen table; I didn’t know this). Some dahl spilled out of one of the bowls and onto the circuit. Oh no! It started to make sounds and as I cleaned off the dahl the sounds changed. At first this seemed very curious, especially at 2am (with my roommate Evelyn sleeping in the room nearby too). Then I realized the sounds were being made by the dahl on the resistor ladder connecting the 555 timer to ground. As I wiped up the lentils, the resistance changed. Through some experimenting, I found out I could hold the metal wand in one hand and touch the pads with my other hand instead of touching the wand to the pads. Then I found out I could put the wand into the lentils and touch the lentils with my hand and touch the pads with my other hand and complete the circuit. I had an idea. I dumped out a water puddle on the table. I put the wand in it and connected to the pad and the puddle with a finger on each hand. As I moved my finger in the puddle I could hear the resistance in the circuit loop changing. I didn’t know what it all meant but it felt so fun and magical. I packed up the circuit into a ziplock bag I had been using to keep socks in from my suitcase. I put googly eyes on the bag to personify the circuit, and I soldered on two stripped solid core wires: one where the ground plane was and one coming off of one of the harmonium pads, and I poked them out from the bag so they were like two antennas for measuring resistance as sound (like a resistance input / pitched sound output pair). Yes, the PicoCrickets kit comes with pipe cleaners and googly eyes. I packed the mangled harmonium circuit into my backpack for the next day at summer camp / school.
Figure 5.14. Harmonium Circuit in a plastic ziplock bag with wires poking out and googly eyes for personification. This is the best picture I have access to of the circuit in the ziplock bag. The 9V battery is in the bottom right corner. The speaker is touching it. The green rectangular circuit can mostly be seen partially obstructed by a Drishya student’s arm. The pads are silver rectangles.We took the circuit and poked the “antennae” into all sorts of things
Figure 5.15. Listening to the electrical resistance between two separate clay plant pots
Figure 5.16. Listening to the electrical resistance between two flower buds
Figure 5.17.Trying the circuit in a bag in all sorts of scenarios explained below.On the top you see two boys working together to listen to the resistance of a plant stem on the right, and to listen to the electrical connection between two separate pots of soil on the left. It was surprising to us that two separate pots would have an electrical path of conductance to each other. After experimenting with what became “Drawdio” over the next several years I learned that unpainted clay pots and concrete are water permeable and therefore conductive if some amount of moisture is present (unlike plastic pots and asphalt which are not). In the second row, you can see the kids testing different metallic objects: tea kettles, tea cups, and door handles. Touching the circuit wires to metal resulted in a very high pitched sound (due to the very low electrical resistance of metal) which was almost painful, as it wasn’t until later that I added some tuning to make a maximum frequency to avoid extreme audio annoyance. In the third row, the kids went into the kitchen where the cooks were preparing lunch for the school. They listened to the hot metal pot as the cooks warned them to be careful and not get burned. They then asked if they could listen to some food and the cooks curiously engaged offering food scraps and listening in. The fourth, fifth and sixth rows show people playing with their bodies as part of the circuit. In the fourth row, on the left a student touches the wires to my forehead then in the middle picture to his own forehead. In the fifth row, they touch the wires to their faces and on the right play hand clap games in a circle. In the sixth row of images, the student touches the wire to his face and either due to a capaciting charging effect or because he was adding more pressure to the wires with time the pitch of the sound went slowly up and up and up and he felt that he was being charged up or transformed into another being. So he started dancing in a Michael Jackson style perhaps it was the Thriller dance as if he was a monster. He can be seen howling in the picture on the left. In the seventh row, the Drishya school facilitators took an interest in what we were doing and began to explore the electrical resistance of the edible garden. Compared with the PicoCricket version of this resistance-to-sound conversion circuit, this circuit was so much louder (bigger speaker, bigger voltage), with such instantaneous feedback (analog .1ms delay instead of digital 100ms delay), and measured over so much of a wide range of resistance (10K to 100M instead of 10K to 1M) that it instantly caught everyone’s intrigue: from me, to the Drishya students, to the Drishya mentors, and the graduate design school students and teachers at Srishti where we ran workshops on replicating the circuit:
Figure 5.18. Top Left: Zack Denfeld, a professor at Srishti, assembles his circuit as I look over. Top Right: Teacher from K-12 school and a collaborator of ours from the Media Lab assembles her circuit. Bottom Left: Hacksawing the circuit apart to remove the “piano” part so that the world can become the piano. Bottom Right: Gabriel Harp solders his circuit together in the “World as Musical Instrument” workshop. Bottom: I pour water on a piece of paper after the “World as Musical Instrument” workshop and for the first time ever experience the joys of playing water as a musical instrument. I start to label the different points at which pitches on the major scale can be heard. Note at this point I am still touching two wires to the paper, not using my body yet. Bottom image is a still frame taken from a video by Dipti Sonawane.In what was basically an amazing coincidence I walked into Zack Denfeld’s classroom as he was teaching design grad students about circuit hacking. I showed the simple sound-making circuit in the ziplock bag and we played with water globbed up on a table. When you put water on a waterproof surface, it tends to glob up and stick to itself due to its own hydrogen bonding through what is termed water cohesion. But when you touch water with an object or your finger, the water also tends to stick to the object, termed adhesion. Through this cohesion and adhesion, simply playing with water on a waterproof surface is really interesting. But when you add a sound dimension to listen to the shape and connections of the water as they move around on the table, it was mesmerizing for the group as well as for myself. We decided to hold a workshop the next day for people to make their own circuits. I made a special run back to S.P. Road (Figure 5.13) to get the electronics ready for the workshop. Note that every driving excursion involves a driver who drives the car for you and what could almost be called a fight or perhaps on a good day a dance with the other cars, the heat, etc. The next day we all made our own sound-making circuits as depicted above in Figure 5.18. The next night I made a “Curious Caterpillar” out of the hacked harmonium circuit by copying a page in the Bangalore kids’ playbook and repurposing a plastic bottle, adding a switch into the nose and sparkly pipe cleaners onto the antennae wires. I added a neckstrap reusing my lanyard to help with hands-free operation.
Figure 5.19. Me soldering on the kitchen tableThis was all the most advanced “product design” I had ever done at this point with circuit and casing integration.
Figure 5.20. A repurposed plastic bottle containing the “Harmonium Circuit.” A lanyard is attached for hands-free operation. The nose is a switch. The googly eyes are added just for personification. And the two wires to explore the world are positioned as if they are the bug’s antennae.
Figure 5.21. The Drishya facilitator made his own circuit as well the following night. The picture on the bottom is while the electricity was out. The man on the right is the cook, the man on the left is a Drishya facilitator and on the left in the bottom picture is a Drishya student.Now the facilitators were interested in getting in on making their own circuits. One of them stayed late after classes, which was a significant sacrifice, and we worked with intermittent electricity and ungrounded electricity as I learned by getting my first A/C high voltage shock. They all laughed at me (in good humor). The cook also stayed and one of the students soldering with us into the night and having a great time. The experience was an adventure, and the enthusiasm for exploring electrical resistance in the world as a sound was surprisingly high, though no one knew where it would lead. The Making of an Invention Kit at MIT Returning home to Boston, I showed this circuit to everyone both in my research group and to friends and collaborators. In discussing with Jeff Lieberman, he showed me that you can draw with a pencil on a piece of paper and that is conductive. We pressed the two antennae against the graphite “circuit trace” on the page and moved them closer together and farther apart to listen to the changing sound. That was interesting. Crayola was coming for a visit to the lab as a sponsor, and the night before, as I sat meditating, I realized that the circuit should not be separate from the pencil, it should be connected to the pencil as a backpack. I got some perf board and soldered together the most compact version of the circuit that I could, copying the layout from a classic 555 astable timer circuit diagram freely available many places online.
Figure 5.22. Me holding the original Drawdio pencil with a small screw jacked into the graphite at the topThis model (depicted in Figure 5.22) still required a wire to wrap around and touch the page, but when we presented it to Crayola I also presented a second model that allowed you to use your body as the wire so you could just touch the page with your finger. It wasn’t until later that that circuit was fine tuned and worked well with the human body. At this point I sketched out a circuit to etch on the Modela milling machine on foam backed copper (FR4)
Figure 5.23. Eagle Board file showing the traces for the first custom-milled Drawdio circuit. You can see the caterpillar drawing left over from before the board got the name Drawdio.The name of the circuit evolved slowly from Curious Caterpillar, named after the bottle form factor with the antennae, to Drawdio, named after “Draw + Audio” in the pencil form factor. I started to iterate on designs
Figure 5.24. Mechanical pencil with Modela-milled Drawdio circuit attached. The mechanical pencil had the attachment to the metal tip of the pencil which came into contact with the graphite as opposed to the screw into the top of the pencil.I took this mechanical pencil to my first ever Maker Faire in Austin (the second year Maker Faire had existed). I let many people try it out
Figure 5.25. Youth trying mechanical pencil Drawdio at Austin Maker FaireAt this point Maker Faire was relatively unknown around Media Lab and several in my group were indifferent to me mentioning I would attend. (Thanks to Amon Millner for taking me). There was so much enthusiasm for Making in general at Maker Faire, as well as that expressed for the Drawdio pencil. I met up with Limor Fried who I knew briefly from MIT who now runs Adafruit, an electronic kit making company. She said Drawdio would make a good kit. Back at MIT Media Lab I continued to invent using the guts in the circuit of Drawdio.
Figure 5.26. Left: a musical jacket with the Drawdio circuit inside “Ok2Touch”. Right: a musical paintbrush with the Drawdio circuit inside exhibited in museumsI then got back in touch with Limor Fried and Phillip Torrone, the two people in charge, at Adafruit and we agreed to make a Drawdio Kit together. This would be a solder-it-together type kit and then attach it to a pencil to make a Drawdio. At this point I started to realize that I was inventing all kinds of fun stuff with this circuit and that the real product here wasn’t the pencil, but the ability for people to invent all kinds of things, just like I had been doing, they could do it themselves. I suddenly saw that this was where the real value was. Not a huge surprise since I was in a group, Lifelong Kindergarten, that studied creative platforms, but I had veered off into a separate exploration as a media artist, and now I brought the Drawdio back to the point of an invention kit. I released the kit with Adafruit and this gave me a steady supply of Drawdios to workshop with people en masse. I began to workshop the Drawdio (more on that in Chapter 7). I also created the “Sample Space” video which showed the Drawdio being used in 26 different scenarios within 1 minute and 44 seconds which garnered 630,000 views on YouTube. More on that video in a future chapter. The sample space video was probably inspired by Hiroshi Ishii’s students’ videos, such as Hayes Raffle’s Topobo video and in particular Kimiko Ryokai’s I/O Brush video. The original Adafruit Drawdio kit shipped with a pencil and a thumb tack and was intended to be made into a musical pencil. Note the innovation which came from Limor to jack into the graphite with a thumbtack through the side of the pencil instead of the screw through the back of the pencil.
Figure 5.27. a Drawdio circuit thumb tacked onto a regular wooden pencil along with example of musical instruments drawn on the paper.
Figure 5.28. a cartoon depicting the flow of electricity when using a Drawdio Pencil: out one side of the circuit, across the outside of the skin of the body, through the graphite on the paper, into the pencil’s graphite core, and back into the other side of the circuit.This iconic project exemplifies one of the core principles of Drawdio usage: you can take an object designated for one purpose and reassign its intended use. Graphite can be a wire, drawings can be musical instruments, your body can be part of the circuit. Since then, people have invented hundreds of interactive objects using Drawdio as an invention platform. Furthermore, because the circuit is so simple, tens of thousands of kids have now learned to solder using their own Drawdio circuit boards from a kit.
Figure 5.29. A modern version of the Drawdio Circuit, which consists primarily of a class of timers commonly called 555 Timers along with some peripherals such as a battery and speaker. The main difference between this 555-class Timer circuit and a typical one is that one of the resistors is left open “to the world." This is represented in the diagram by a stick figure. This is the version of the circuit that is currently distributed as a kit. This circuit design was led by Limor Fried with me giving feedback along the way. This circuit diagram drawn by Limor Fried.Because of the new insight that Drawdio is truly an invention platform, Adafruit and I released a second kit called Drawdio Fun Pack, which comes pre-soldered and ready to be used for invention:
Figure 5.30. Drawdio Fun Pack comes with● Assembled & tested Drawdio - no soldering required!● Large brush● Soft lead pencil + thumbtack● 2 x Alligator clips● 4 x Wire ties (the photo shows 2, but the kit has 4)● 12" of copper tape● 2 AAA batteries included!This Image reproduced from adafruit.com. Thanks to Limor Fried for leading the design of this kit.This is the Drawdio that was used for all the workshops, and is the Drawdio referred to whenever “Drawdio” is referred to abstractly in the case studies below. Along with the kit there was also a Drawdio video which showed example projects that you might make with the Drawdio. This is critical to the activity. The original Drawdio actually isn’t that much different from a 40-year-old 555-timer circuit, just a couple alligator clips and circuit tweaks. But what is new and makes the product feel like so much more is possible is the Sample Project Space video.
Figure 5.31. Introductory Portion of Drawdio Sample Space Video available for viewing at Drawdio.comMost workshops were run in conjunction with this video so it is important to show it since without it one might think “what do I do with this Drawdio thing?” This is the first half of the video where the viewer is oriented to what the Drawdio is. The first substantial scene is the Drawdio getting thumbtacked into the pencil as shown in the top row on the left. The pencil is considered the iconic example and also a great example of what you can do with a Drawdio. It’s also named for this example. Then the simplest thing is shown, a line is drawn and the finger touches the line and the pitch goes up and down corresponding to the finger sliding closer and further from the pencil tip. Then top row right a spiral piano is drawn and discrete notes are played by touching the pads with the pencil on the spiral piano, playing a tune. The circuit is then unhooked from the pencil and attached to an ordinary paintbrush, middle row left. Again a line of water is drawn, middle row center, and the finger plays the water as before. Finally a tune is played on a leather couch arm. The circuit is then unhooked from the paintbrush and attached to a kitchen sink, and again an up and down slide is played, and then a tune is played (in this case “The Itsy Bitsy Spider Went up the Water Spout”). In each of these three examples the circuit is built in front of the person and some orientation time is given followed by examples. This is the “slow” half of the video although it takes only a minute to go through these.
Figure 5.32. Second half of Drawdio Sample Space Video available for viewing at Drawdio.com.The video then speeds up and starts showing one example after the next in just a few seconds each. Top row is an indoor tree, a musical jacket, and a group holding hands. MIddle row is food: mac ‘n cheese, Gatorade, and a banana. Bottom row is outdoors, a tree, a metallic rock-like sculpture, and a bike wheel. At first they are about five seconds each, but they start to dip into the three and two seconds each range crescendoing until punk rock music plays and lots of images flash and spin. See the video at drawdio.com. The intention is to first orient the viewer, and show the full buildup of the project to make the viewer feel at ease that it is easy to do. Then to show a small jump from the first example, a pencil, to a more complex example, a paintbrush. Then a bigger jump, a kitchen sink. Then just jumping all over exploring various things as fast as possible, giving the sense of the range of possibilities. Ideally, the participant in the workshop who watches this feels informed and inspired, but still feels like there’s lots of creative space, in face more than before watching the video, in all the space inbetween the examples shown, or with re-exploring examples that are shown or variations thereof. 6. MaKey MaKey Genesis In this chapter I’ll tell the stories of how I came to think of computers as crafts, and apps as something worth remixing just like popsicle sticks are glued together. These stories will form the soup in which you will perhaps be able to imagine how Makey Makey could have come about. Then I will tell all about the evolution of Makey Makey with special attention to the design of the user interface, ending with the launch of the project. Computer Crafting Computer Crafting is the name I have given to using computers just as if they were any other craft material: tape, play dough, paper clips. This is to treat the modern advanced machine of our day as just another piece in our prototypes or crafts. In summer of 2009 I found myself back in India running some more Scratch workshops, this time on mobile devices (keep in mind this is just barely pre-iphone still) supported by the work of John Maloney and the Scratch Team. The workshop I designed was based on an idea called Awareness Mapping, a theme co-developed with Karen Brennan (my groupmate), and executed with support from Zack Denfeld and Geetha Narayanan’s Drishya team and worked like this: We went out and took pictures of urban nature in the slums the children lived in.
Figure 6.1. Students at Drishya, a slum school, “taking photos of nature” in their community however they choose to interpret that instruction.We drew a map on a big sheet of paper of the entire village. Each youth then picked their favorite example of nature, and we acted out what that piece of nature actually does with live role-playing theater. We then talked about how maps are static and flat, but actually the world is 3D, dynamic, and moving around. We drew a chalk diagram of parts of the map and added in arrows to represent the motion and dynamic nature of their village. Then we made 3D paper models to overlay on top of the map.
Figure. 6.2. Left. The map of the village with 3D popup models of each child’s favorite aspect of nature in their community overlayed. Right. A chalk drawing of one part of the village’s dynamic motion. The arrows show how the milk trade carries out each day.At that point it was time to make the map dynamic using computers as if they were just another craft material. At each part in the map where the children felt they wanted to represent an important part of nature to them, they cut a hole the size of the mobile device, in this case it was a Nokia 810. Then in Scratch the photos they took were used to create interactive projects that responded to taps, sounds, etc., and made some animations or noises as a result that represented the nature in that location. The resulting map had a dozen or so interactive mobile devices embedded in the paper that ran simultaneously.
Figure 6.3. Left. Computer crafting example closeup, screen worked into paper crafting. Right. Map with holes cut in it for mobile devices to be inserted. In the picture are myself, collaborator Zack Denfeld, and the Drishya students.The picture on the left is one of those 11x17 sheets of paper. It is a good example of computer crafting. The screen is embedded into the middle of regular paper. The bricks on the screen are contiguous with the bricks drawn on the paper, as is the water in the ditch (blue on the paper, blue on the screen, although color in the photograph appears mismatched due to screen brightness). A mosquito flies around in the ditch between the bricks. These mosquitoes can carry malaria and are a problem in this ditch in this slum village, which is why the student chose to focus on the corresponding picture he had taken in Figure 6.1 on the left. When you “clap” the screen sends the mosquito away but it comes back.
Figure 6.4. Top. Two examples of interactive map pieces being installed on site of the places in the map which they represent with computation and paper crafting merged. Left. A monsoon that ruined what used to be this student’s home. Right. A problematic bathroom/trash area. Bottom. A closeup on the screen of the monsoon rendering the student’s home unlivable (one of several frames of an interactive animation. In this frame the rain is the front layer that moves across the background layer of the houses and trees).After showing the map to the other students in the school, we also made individual installations for each location from the map, like little breakout interactive maps bits, and took them to the locations which the mini map represented. On the left we see an installation on the site of the student’s home which had previously been ruined due to a very heavy monsoon. On the right we see an installation on bathroom and garbage heap, where the paper itself has been made to blend in with the dirt and trash around it, as has the screen been made to blend into the paper. At each of these temporary installations the families of the children and some neighbors naturally gathered around the installation site as the children told their story of how they interpreted the interactive map and how the situation affected them. That Fall I continued my work on Computer Crafting using the Nokia 810’s in a Not Back to School Camp workshop where unschooled teens were explicitly encouraged to craft the mobile devices running an interactive Scratch project directly into their environments
Figure 6.5. Interactive Fashion - Scratch running on Nokia 810 duct taped into teen’s hat, at Not Back to School Camp computer crafting workshopAt this point I was so excited about the idea of crafting on the fly with computers the same way we craft on the fly with material (paper, popsicle sticks, and everything else), I decided to try out computer crafting for Halloween. I dressed up like a doctor, and I cut a hole in my blue scrub shirt near where my heart would be. I downloaded an animated GIF of a beating heart, and I loaded it into Scratch. I then made the speed of the rotating images be proportional to the amount of noise around me, so that the louder the environment the faster my heart appeared to beat, or if you yelled at me my heart would beat really fast. Then I inserted the laptop under my shirt. It was an IBM Thinkpad, which was able to open up to 180 degrees, so the trackpad was held tight under my belt while the screen was sticking way up to my chest over my heart where the hole in the shirt was. The keyboard sat hidden covered by my shirt, in between the hole in the shirt and my belt. All that was visible was the part of the screen showing the life-size heart beating, cropped by the circle cut in my shirt. I added a little fake blood to the T-Shirt around the hole, and carried around a knife with me that night saying I was doing my own open heart surgery.
Figure 6.6. A Halloween I made costume using a laptop inside of my shirt, a technique I call computer crafting.I knew computer crafting was going to be big, but I also knew that it had to be more accessible. Up until now, all the examples I have shown used custom software built (in Scratch) for that specific computer crafting scenario. It would be nice if apps could be grabbed and reused, with the customization being a later step. LEGO has one damn rule: you push blocks together to make them stick. That’s the kind of computer crafting we needed if we wanted a low bar to entry. Over the next several years I would try desperately to make something as complex as a computer controllable by something as commonplace as a pencil. Or as my advisor says in his paper, Computer as Paintbrush: “Which of these things doesn’t belong? Television. Computer. Paintbrush.” He goes on to say it’s the television that doesn’t belong. But when does a computer feel like a paintbrush? When does a computer feel like mud? I wanted to make that jump from drawing sounds with a Drawdio to “drawing” or “painting” computation with a computer. But how? I didn’t know. But I had lots of ideas. In this section I will tell about several prototypes that were never even named or documented, that took a day each, or a week in the case of Gesture Base Scripting. These ideas and prototypes are meant to show the space I was searching around in, which lead to a sort of area which I was steeped in when Eric and I first invented Makey Makey. Pencil Volume ControlAt first I got together with my undergraduate researcher, Tyler Williams, and tried using my trusty Scratch sensor board, hacked slightly to read higher resistance levels to make it more in line with measuring real world items. I hooked up a pencil to a Scratch Sensor Board, by jacking into the graphite running down the middle of the pencil using a thumbtack. I set up a program in Scratch to let the resistance of the sensor be linked to the volume of the music playing inside the Scratch program. In this way, I was able to draw on paper to change the volume of the music, and it was fun because I could draw different shapes and patterns that would control the volume in interesting ways: ● stripes that made the volume oscillate quickly between on and off over and over again as I slid the pencil across the stripes perpendicularly ● a simple line that slowly faded the volume up and down as I traced over it with the pencil ● Pencil sketched icons of a party, a restaurant, and a person sleeping, each of which would turn the volume to the appropriate loudness: max, middle, silent, when touched with the pencil (the amount of resistance, and thus the volume, was “programmed” by how dark the lines I drew to the icons were). This definitely felt right, but only being able to control volume just didn’t feel explosively expansive or empowering with wide scope. I experimented with controlling the mouse-x and mouse-y with the pencil and this was interesting as you could draw a mousepad of various shapes, so I explored mousepads some more next. Anything Mouse PadI had an idea to make a mouse pad out of a dish of water. I wrote a Scratch program to triangulate the 2D position of an object based on three distance measurements from the object each to a known separate point. I ran upstairs and grabbed Jamie Zigelbaum, a Media Lab student and collaborator, because prototyping alone just isn’t the same. We took a small plastic tub, actually coincidentally it’s the same one pictured in Figure 5.7 Left, and attached three wires to the corners of the tub on the inside with tape. We connected each of the wires to the resistance input sensors of the Scratch Board (hacked with 100M Ohm resistors so that it could sense the higher resistance of water accurately). We then grounded a fourth wire, and moved the fourth wire through the water in the tub. We used the Scratch program I had written earlier to transform the three resistance measurements into a location of the fourth wire, so that we could then move the mouse cursor on the Screen to wherever the fourth wire was in the water dish. Within 2 hours, after a lot of calibrating, everything seemed to be working, so we used the Scratch “pen down” feature to try to draw a line on the screen by drawing a line in the water. Then line ended up being jagged and a bit curved, but it did work! Momentary excitement faded into the big question: How can this be an empowering toolkit or platform that many people can create with? The idea of making a “mouse pad out of anything” was pretty interesting: mud, cereal, a still-wet painted picture, and to this day I wonder if there is something latent in this project waiting to be developed. But I was searching for something bigger. Something without: ● A long or potentially confusing calibration stage ● The need to use with special software ● More diverse outputs than different types of mice Gesture Based ScriptingNintendo Wii controllers (WiiMotes), which are basically bluetooth-enabled accelerometers for the purposes I’m using them here, had just become easy to hack with the release of some new open source software. Tyler Williams and I repurposed a Hidden Markov Model Gesture engine and combined it with a WiiMote and a scripting language that let you make your computer complete certain tasks (called scripts) upon receiving a particular gestural input from the WiiMote. Further we let you define your own gestures. So what we ended up with was a situation where you could define a script by recording it on your computer: press record, do an action with the mouse and keyboard, press stop. Then that action could be repeated when you perform a certain gesture. To define the gesture, hit record, move the WiiMote in a certain pattern, then hit stop. In this way you could make actions happen, discrete actions like pushing a button to initiate a sequence of events rather than tight feedback of each motion of the hand mapping to subtle shifts in sound or mouse motion. In this way you could make: ● A video play when you take a sip from a cup (WiiMote taped to cup) ● A sound play when you dance a certain dance move (WiiMote tucked in gym sock) ● An email send “someone is here” when someone opens your door ● Make a character in a game jump when you jump For the first time I felt the power of being able to control every webpage and every computer program on your computer. The scripting language worked just like the mouse and keyboard, so anything the mouse and keyboard could do the scripting language could do. This was so powerful because nearly every piece of software ever made can be controlled by mouse and keyboard. However, configuration was still very time consuming, the gesture recognition could be frustrating, and didn’t always work. In addition, scripting languages are complicated and only execute correctly if you set up all the right conditions. With enough work, this has a chance at being a powerful platform, but I left it as I felt its fruit was not low hanging enough from an implementability standpoint, and something felt a little bit too Artificial Intelligence about it instead of Human Intelligence. In other words there was a feeling of wiz bang about what the computer was doing, when that type of feeling should really be felt by the person for what they have created. In any case I still believe it has a chance of going somewhere someday.
Application Dumpster DivingThis would allow a new form of digital repurposing, or what I sometimes like to call digital dumpster diving. By allowing people to scrounge around the web for photos and sounds, many visual and sound artists are greatly empowered with the entire digital world’s worth of billions of images and sounds to pull from. Photoshop and Audacity are examples of image and sound editing programs that let you chop up images and sounds that you find and remix them in new ways. Currently, only the coding elite, people who have a mastery of programming, can mix and match pieces of applications (typically in the form of code) to make new uses out of the applications. How close can we get to giving the non-expert-coder the opportunity to grab apps and use them in new ways, to dumpster dive through a pile of interactive webpages, and make new meaning out of what they find, just like an artist who pulls items from a dumpster and makes a sculpture? Probably not as close a coding will get us, but by giving people the ability to control and use applications in a new way, that is a step closer with a lower bar. What if we could extend applications to the list of things that can be found and reused on the computer and on the internet? Magic Seth first introduced me to a new type of workshop [Cottam, Defcon 2013, Sketchtools: Prototyping Physical Interfaces] and hacking activity where people take keyboards, pop the plastic keys off and solder wires to the two leads underneath the button, which would normally be connected via a person pushing the keyboard button. Now the two leads could be extended to two wires which could be taken out to the world and hooked up to any ordinary button or switch, or one can make a custom switch by which two pieces of metal come together through any action, thus connecting the keyboard button circuit. This idea was powerful and reminded me of the scripting I had done in the gesture-based scripting section and of the mouse input I had done in Anything Mouse Pad section. Eric Rosenbaum started using this technique to trigger the pieces of software he had written using big buttons rather than using the laptop on which he had written the software. You see, a big secret of prototyping is that the fastest way to prototype anything is almost always on a laptop (in other words, on a personal computer) because that’s where coders have the most freedom with multiple powerful languages and powerful processors all available in the same place. But unless your software is meant to be distributed on a computer, then you quickly want to embed that computer into your creation so it becomes more experiential and less like the experience of using a computer, or you want to migrate it to a new embedded platform that is ready to talk to sensors. Here Eric and I were, literally stuffing an interactive music project Eric had made on a laptop into a box. This meant stuffing the entire laptop into a wooden box, and then popping off a mouse click button (analogous to how the people would pop off the keyboard keys in the workshop mentioned above), and soldering wires to the mouse click internal leads to hook up a big red button on the outside of the box which would help control the interactive sound installation. If this is not computer crafting then I don’t know what is, but it requires a somewhat high level of hacking skills to write the custom code, and solder to the mouse guts. At this point a new idea was fertile and ready to emerge. We needed to give people access to push any keyboard key or control any mouse function, just like the hackers in the workshop, but on the fly in a matter of seconds. This could be the secret “duct tape” that could join any computer app with any everyday object. Inspired by computer crafting, and app dumpster diving, and still interested in “how to make Drawdio talk to computers,” Eric Rosenbaum and I built a prototype of what yet had no name, and would have interim names like Project Q and The Mousinator, but would become Makey Makey. Eric carried out the first prototype building with some technical hardware input from me for a workshop stint at the Exploratorium. This first prototype looked like this.
Figure 6.7. First Makey Makey prototype on perf board with a Teensy and some female header and 10 Mohm resistors for the resistance sensing. (Photos by Eric Rosenbaum)It was built on a Teensy (a type of microcontroller platform). The teensy is the green circuit in the middle of the prototype. It is stuck into perfboard (brown), which is like a free form grid of holes to stick circuit pins through and then solder and connect the pins as you like on the opposite side. Then going outward from the teensy are two sets of 2 rows of female header pin, which wires can stick into (and are doing so in the photograph). The inner row of female header are all ground or “earth” pins. The outer rows are keyboard and mouse triggers: ASDFGHJKL, and the mouse sensors at this point worked by measuring the amount of resistance and mapping the mouse x and mouse y to that amount on the screen (low resistance, mouse x would move the mouse to the left, high resistance move mouse x to the right). Each keyboard key could be triggered upon connecting the ground to that keyboard key through an object, so long as the object was less than 10Mohms. It showed some promise and in Eric’s workshop the creative people in the Tinkering Studio at the Exploratorium were able to get examples up and running such as aluminum foil pads for Dance Dance Revolution, an interactive foil user interface where you blow on the foil to make art on the Screen using Scratch, and drums embedded in to jean pants. After the workshop, the momentum for the project lulled and it sat still for 1 year. At that point I was in the summer lull in between interning and coming back to school, a beautiful moment in time with no responsibilities. I had been interning at Intel in Silicon Valley. The entrepreneurial spirit of Silicon Valley is somewhat contagious, and I found myself thinking about what would make a good second product to follow Drawdio. I did not have the foresight to know that the Mousinator/Makey Makey would be the one. Instead I turned all my loose ends around in my head, projects mentioned previously in this chapter, and others unmentioned. In daydreaming like this, I realized that the mouse motion for Makey Makey did not have to be an analog sensor that moved the mouse to the point corresponding to the resistance. It could just be a button like all the other keyboard keys, which when pushed would continuously move the mouse in a direction (up down left or right) until the button was no longer pushed. While not as beautiful in some senses as analog input can be, this would provide a single uniform rule, like LEGO has, of how to use the device, and yet the device could control your entire keyboard and mouse. Everything would simply be a button input, on or off, purely digital, connected or not connected. This seemed like the type of breakthrough elegance needed to let anyone understand how to use the device. There would be only one rule: Make two objects touch each other to trigger an action on the computer And this single rule would let a person hook any object in the world up to any program or any web page or app on their computer. I was excited about Santa Cruz, where we had been living, and Silicon Valley. We (my family and I) decided to drop out of MIT and move to an Ashram called Yogaville in Virginia for 6 months, followed by a move to Santa Cruz. It was during the time at Yogaville that the hardcore development of what would become the Makey Makey really happened. I would collaborate with Eric, still at MIT, first by landline, until I was able to get Internet set up in the remote foothills of the Blue Ridge Mountains (I literally ran an ethernet cable 600 ft through the woods to share 1 MBit/s internet with my nearest neighbor). We had narrowed down the Makey Makey from a board with dozens of inputs, even considering at one point the idea that we could have one input for each and every keyboard key on a computer, down to a board with just 6 inputs: up arrow, down arrow, left arrow, right arrow, and space bar, and mouse left click. We arranged those six buttons to look like a game pad controller with “Earth” along the bottom.
Figure. 6.8. The first sketch of the modern Makey Makey interface and iterations from there to the second functional prototype that we used to do user testing and make an example projects videoWe started collaborating with an engineer, Jim Lindblom, at SparkFun to draw up the board. We gave him the drawing on the top. He gave us the drawing on the left in the middle row. We Photoshopped that and gave him the drawing in the middle to make the mouse and spacebar look like buttons, round, and to put an outline around the arrows. He implemented the changes and gave us back the drawing on the right. We approved it for the second prototype (the first one made by SparkFun), and he sent us actual circuit boards like the green one you see on the bottom. The firmware was a collaboration between Jim, myself, and Eric. Once we had the circuit board in hand we were ready to make a sample-project-space video. The sample-project-space video is extremely important to helping people understand what your tool or platform does. Your tool is a terrible representation of what it does. Think of a hammer. Looking at a hammer you would never know it could help you build houses if you didn’t already have experience. So since we are inventing new technologies, to show what that technology is, is to show the types of things that it can do. Here the example projects shown in the video we made:
Figure 6.9. Representative stills from the Makey Makey example projects video available on makeymakey.comThe top left is our first example. Your first example must always be the simplest possible example, so we showed a single banana getting hooked up, with a word processor on the screen. Then when the person touches the banana, it types a “space” on the screen. The next three photos are of a game controllers made of play dough, pencils, and buckets of water. The Makey Makey is visually styled like a gamepad, and we wanted game controllers to be a category, but we wanted the examples to be different enough to show that there are these examples and many others beyond and between these ones. Before each example we showed a person typing in the game on Google to find the game via searching the internet, and we showed each being assembled in sped up time. The next three examples are music examples. We wanted music to be another category. Stairs, bananas, and humans are used and the instruments each play a recognizable tune or impressive rudiment. The last two examples are inventions, one is a cat bowl that triggers a cat selfie, and the other is a customized keyboard made of alphabet soup. There was actually supposed to be a third invention, but it didn’t end up looking right visually. It was a gong that you could hit to make Pandora skip to the next song, but it was hard to understand. Anyways we intended to have three categories and three examples in each category. That gives a nice rounded “three dimensional” set of types of things you can do with the Makey Makey, as well as three examples within each category. In order to make a sample-project-space video, you have to try out making all kinds of things, and best to show them to people too. For a couple of months, at the back of my forested house at Yogaville, I opened up the back apartment as a Maker Space. I called it Mega Om (a play on “Om” from yoga and from electronics)
|


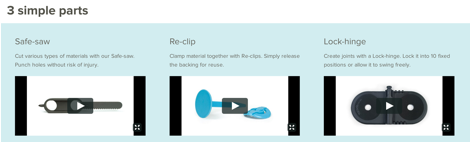
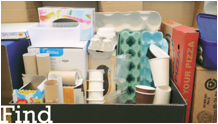
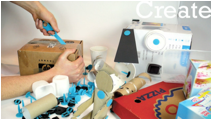
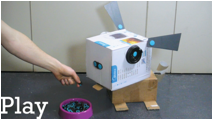
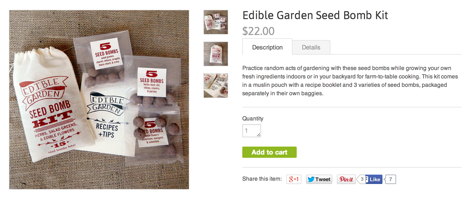
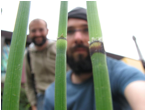
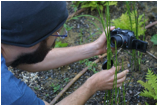


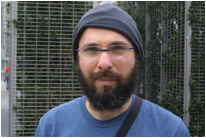
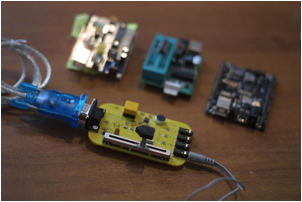
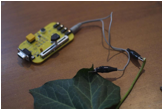
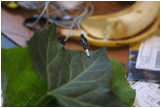
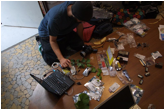
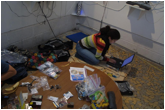
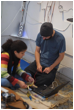
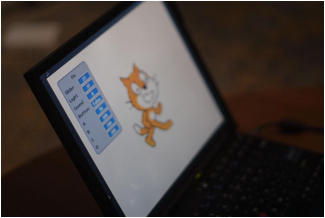
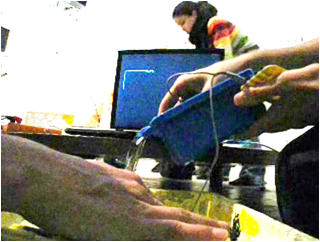
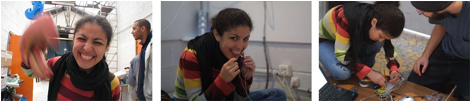
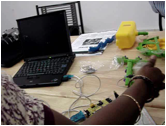
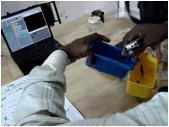
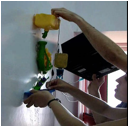

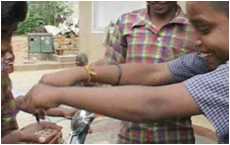
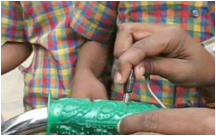
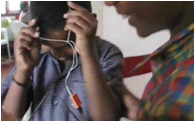
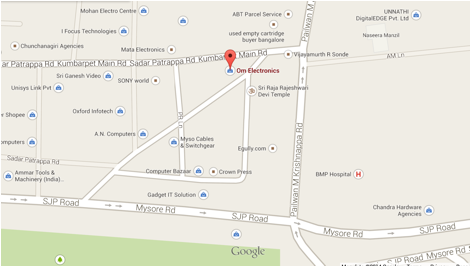
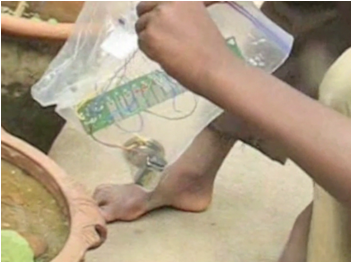
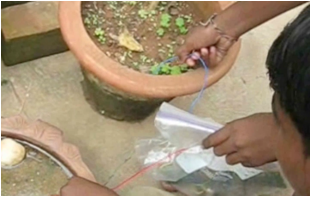
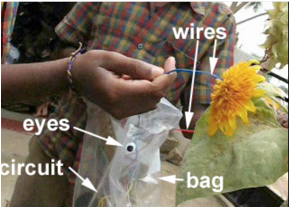
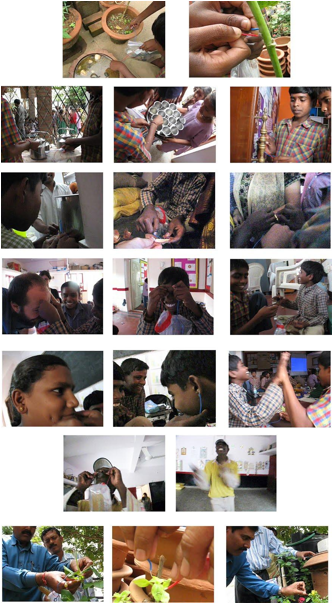
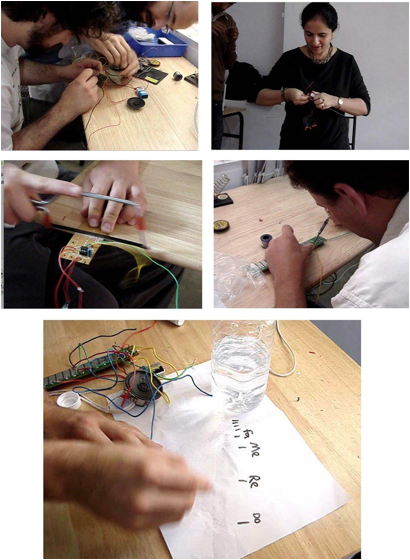
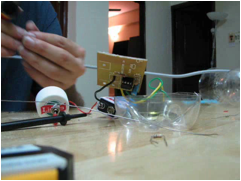
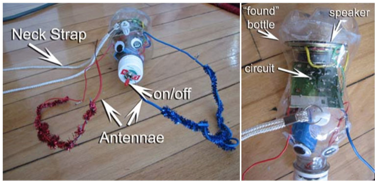
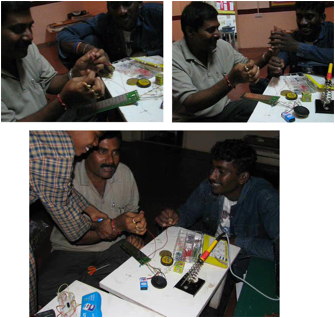
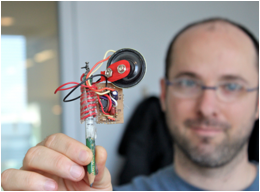
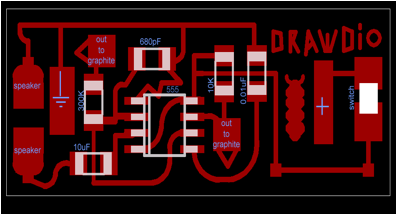
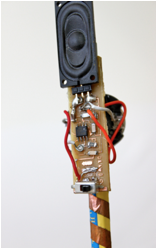

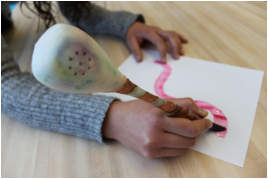
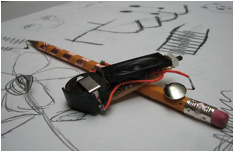
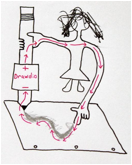
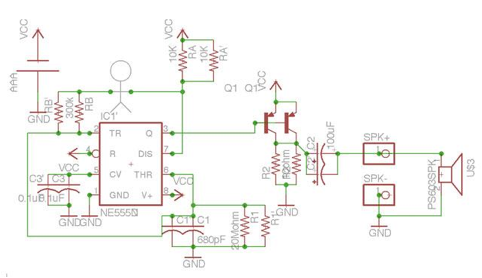
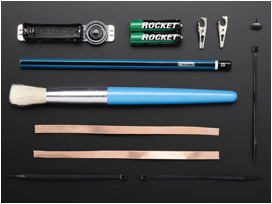
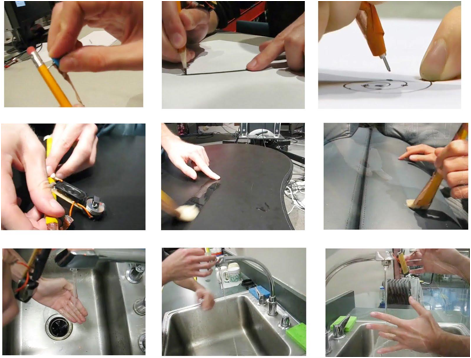
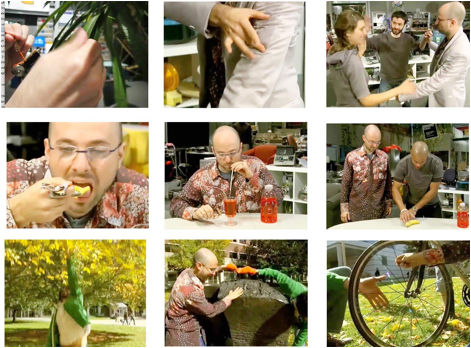


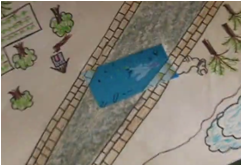
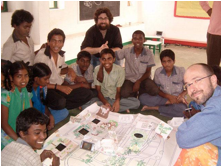

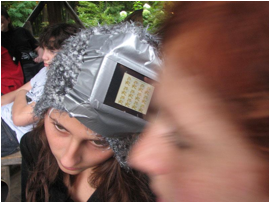
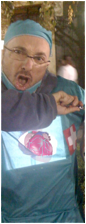
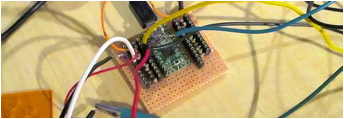
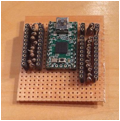
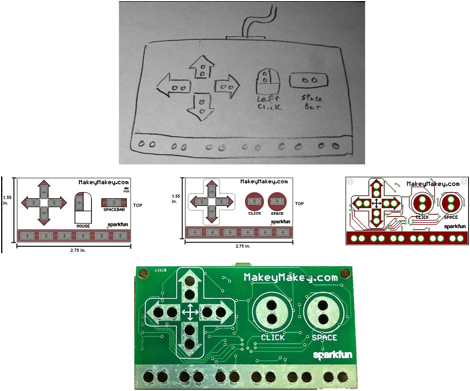
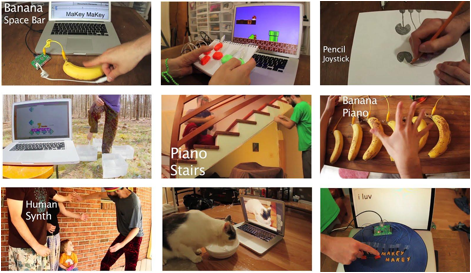
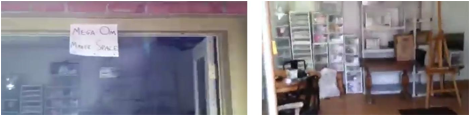
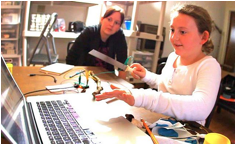
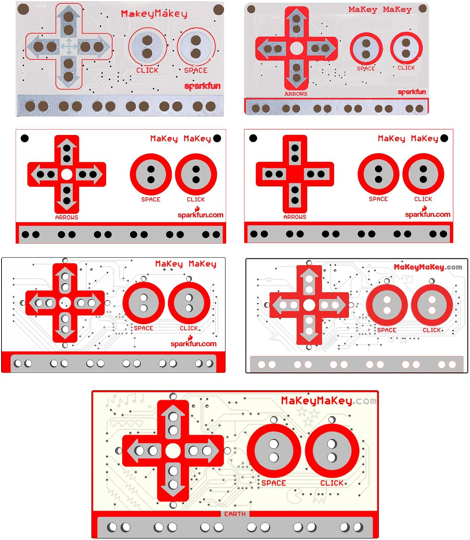
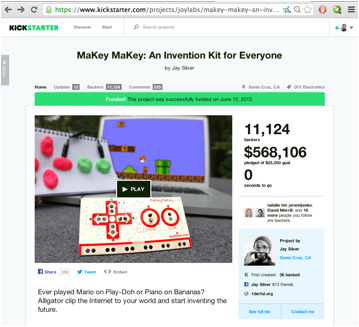
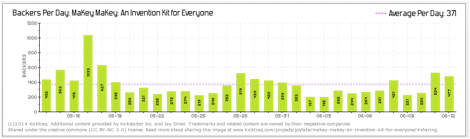

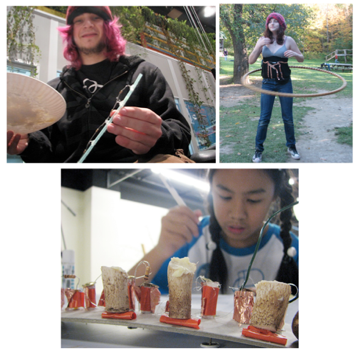
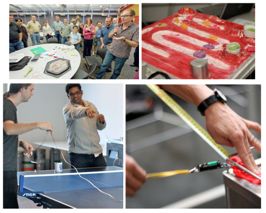

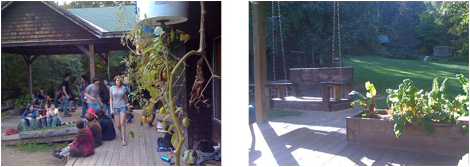
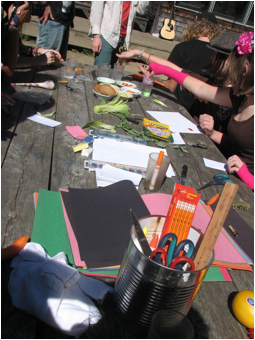
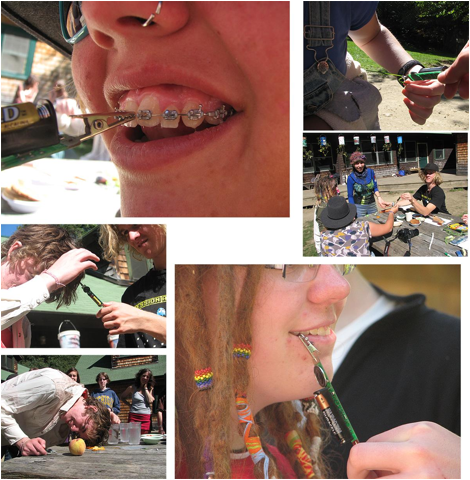

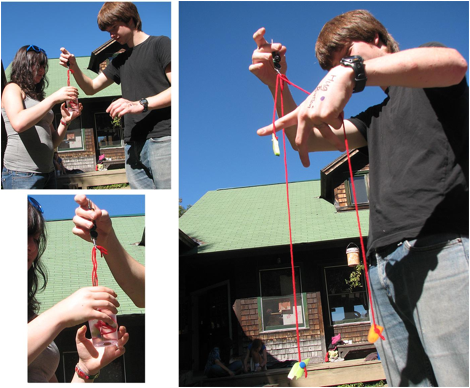

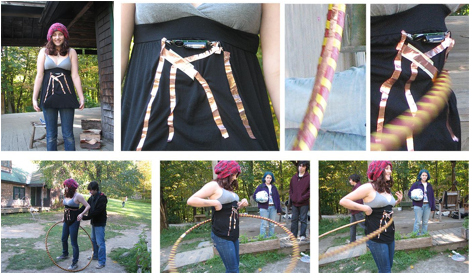
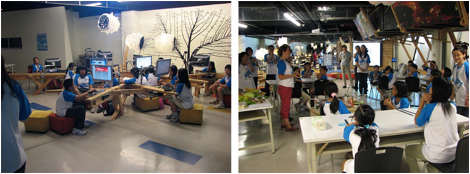
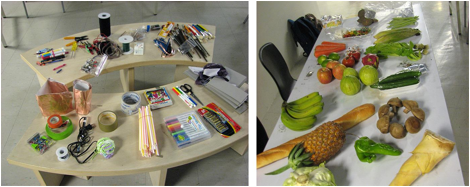
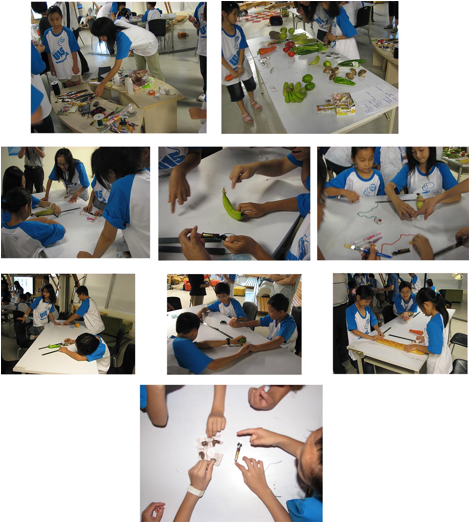
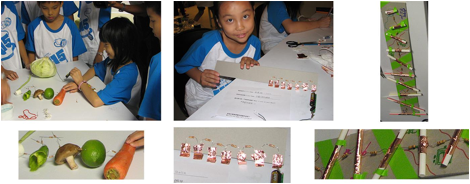
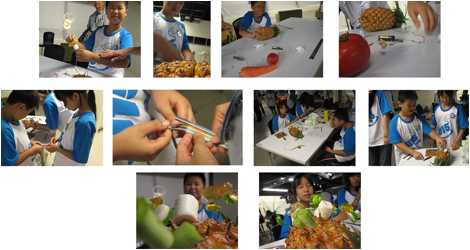
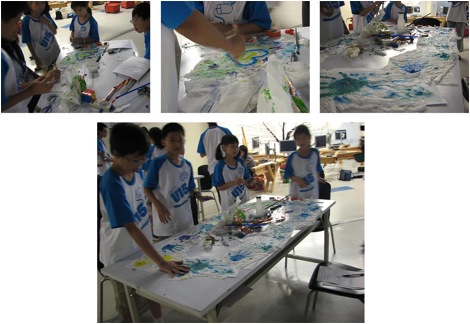
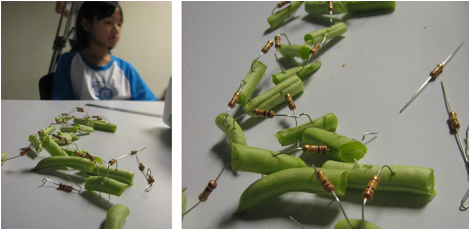
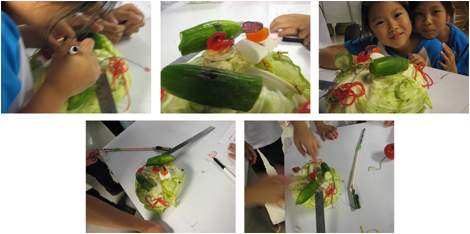
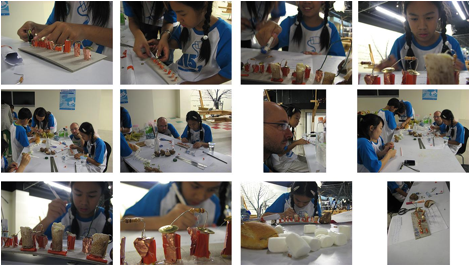

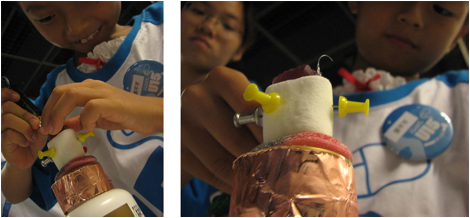
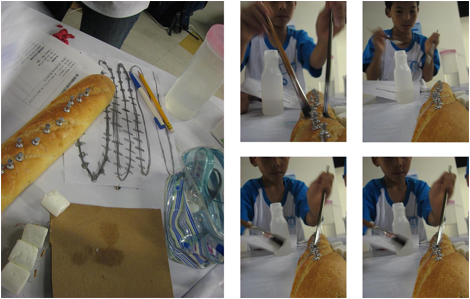
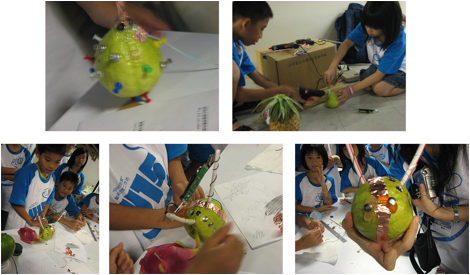
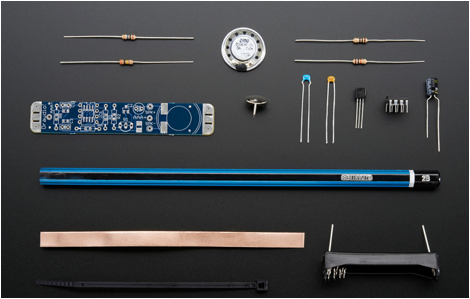
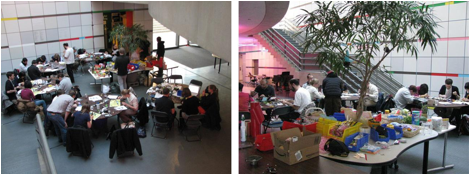
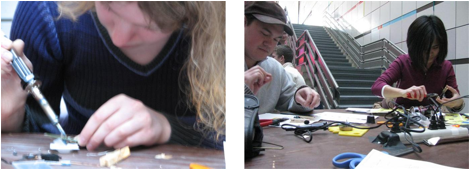
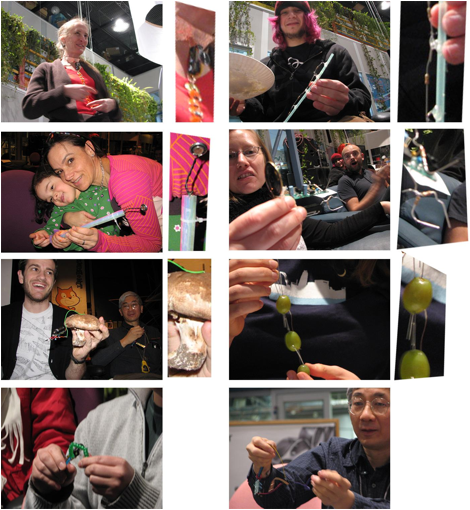
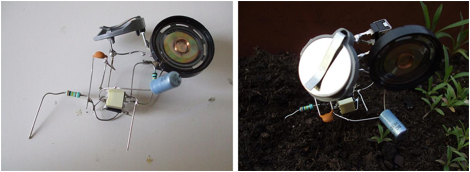
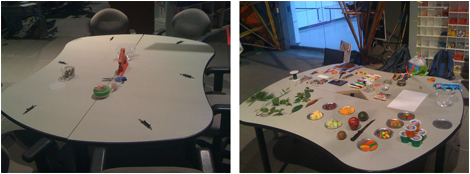
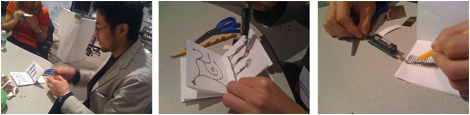
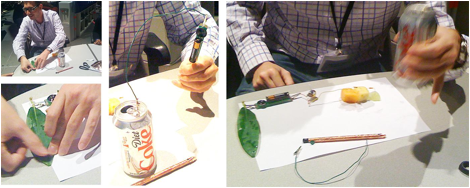
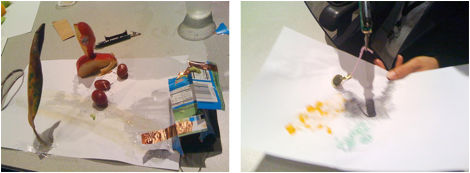
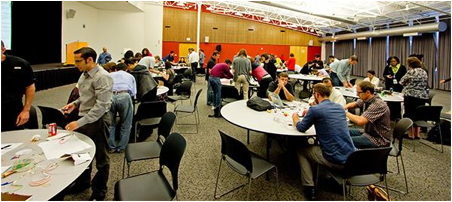
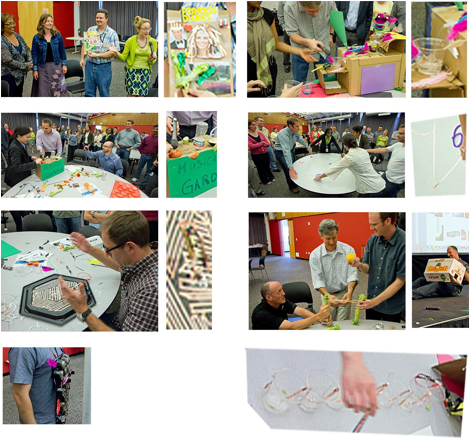
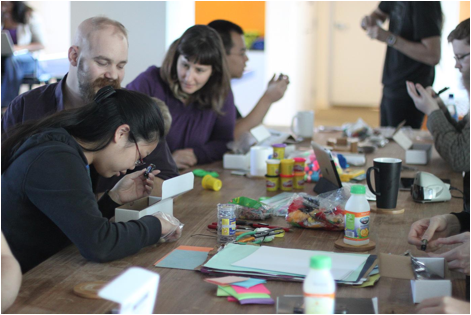
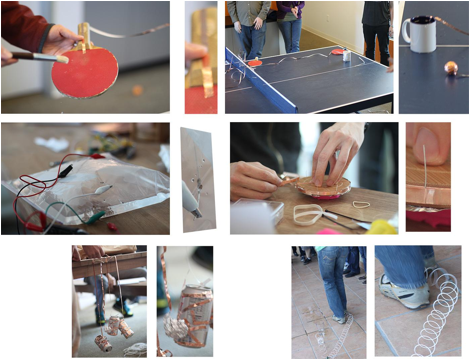

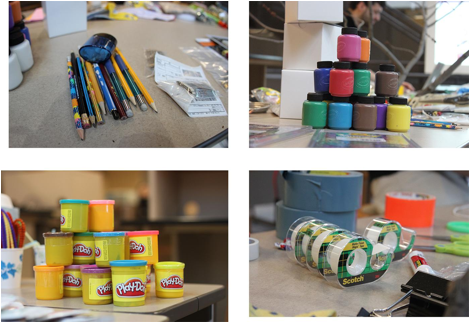
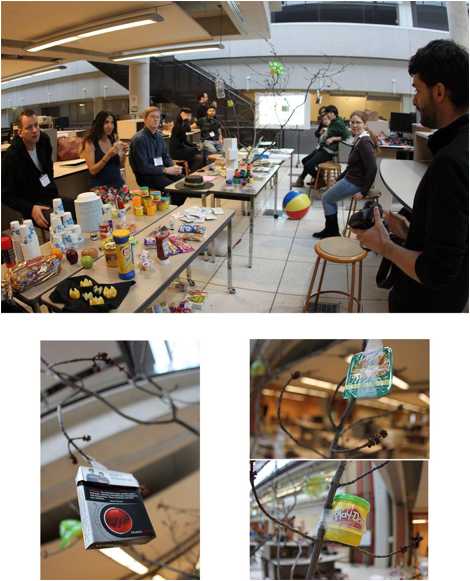
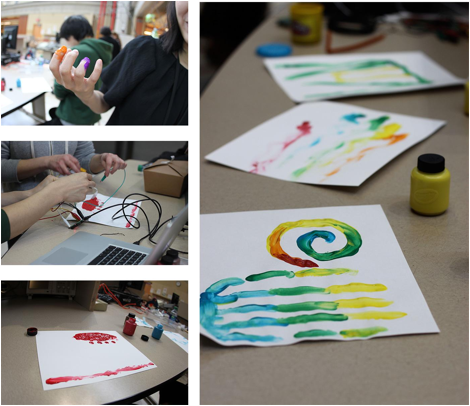
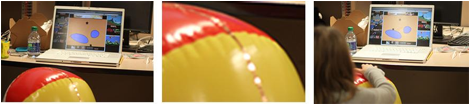
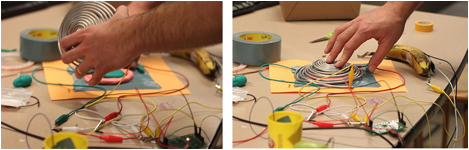
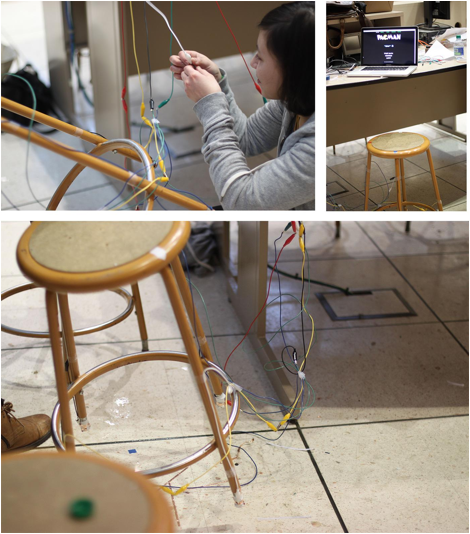
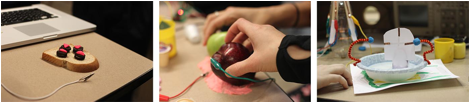
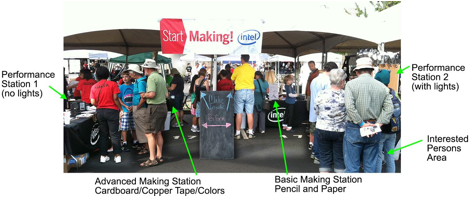
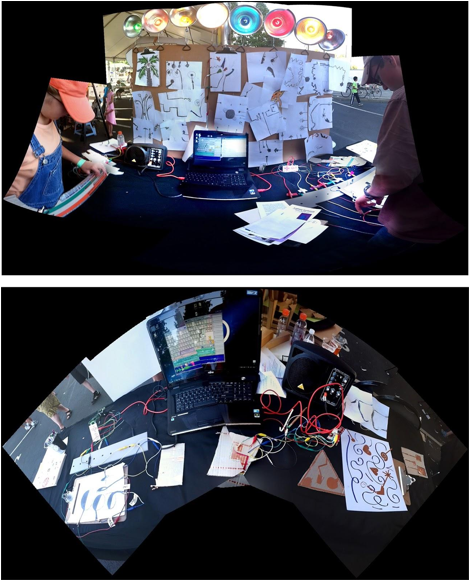
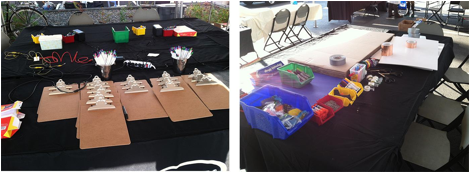
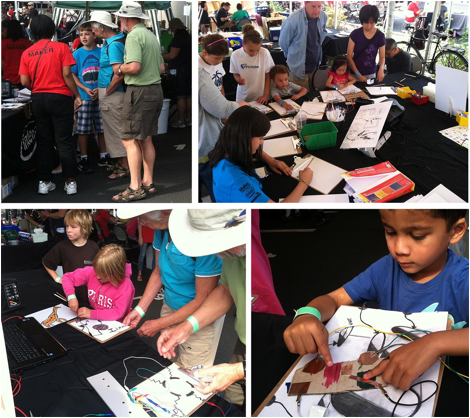
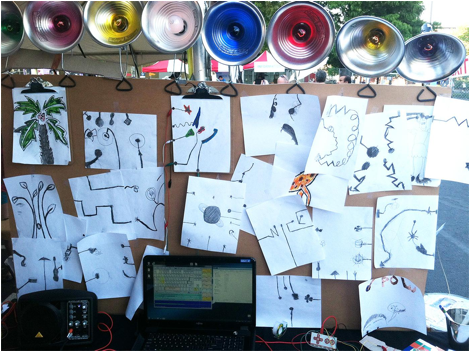
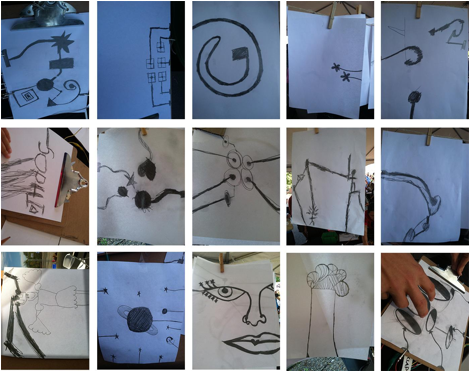
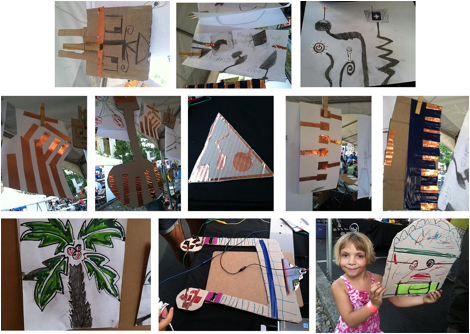
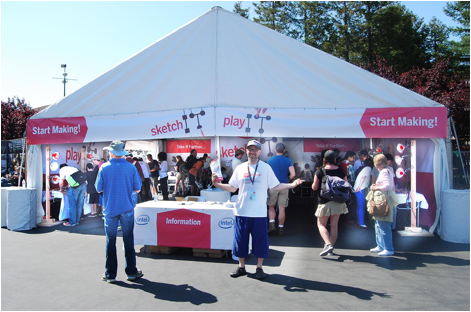

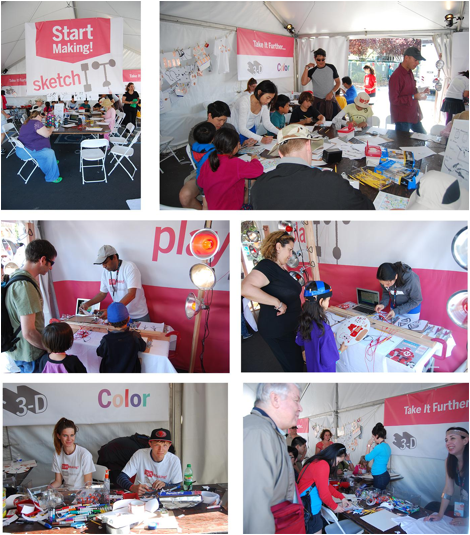
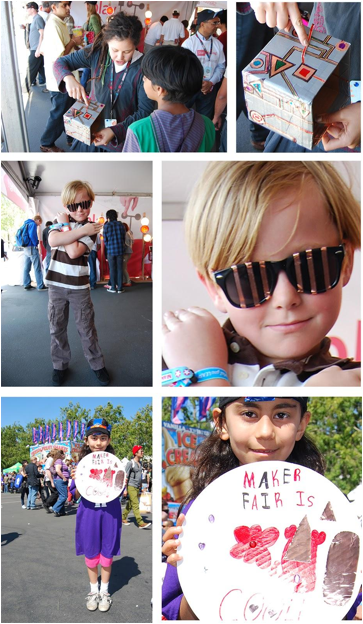

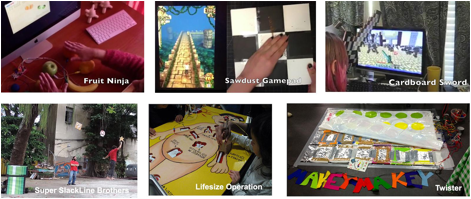
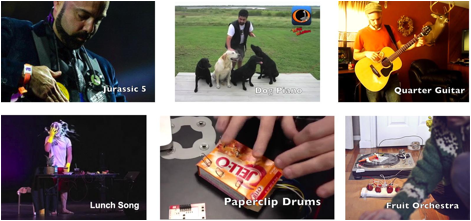
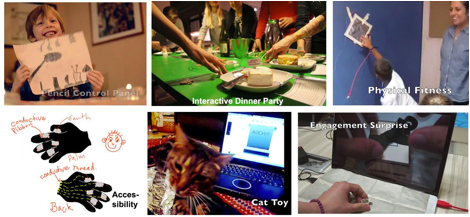
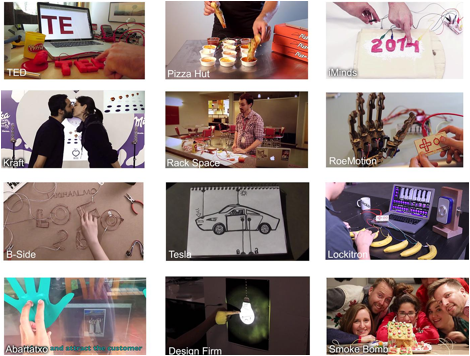
|
Linguistic Pointer / Terminology |
2010 |
2012 |
2014 |
|
The Tool |
Gift |
Block ☓ Lens |
Constructive Lens |
|
The Object |
Modern Nature |
Everyday Object |
Everyday World |
|
The Point of View |
Intertwining |
Creative Confidence |
World as Construction Kit |
|
The Subject |
User |
Creator |
Participant |
Table 9.1. How my language evolved over the course of the thesis.
To step outside of the narrative of the thesis itself once more, it is important to understand the academic context in which the thesis was conceived, as all contexts have a bias, and all academic departments are a context, which is helpful actually to making progress. The idea of seeing the world as a construction kit actually goes far beyond the ideas presented here as Constructive Lenses. The entirety of the idea of the world as a construction kit could be carried out without any technology at all, as demonstrated by Andy Goldsworthy and countless others. I could write an entire thesis on how to evoke the world as a construction kit in people’s eyes with just activity guides, and without any new media tools or computational or electronic implements. And in fact, I can argue that I have not substantially introduced any new tool with the Drawdio project, only a new context with some tweaks to an old tool. However, given that this thesis was written at the Media Lab, and given that I am by my nature predisposed to investigating the results of new media artifacts like circuits, the tools have ended up taking precedence in this writing, or at least they are placed alongside the activities which guided their use.
Lastly, nowhere else spoken of, I took 2 years “off” (at least from the writing part) from early 2012 to early 2014 in the middle of writing this thesis in order to pursue the full-scale launch of the Makey Makey business.
Intro
This discussion section, Chapter 9, is meant to be as useful as possible. More on the side of guidelines on how to make Constructive Lenses, rather than an exact proof that I have accomplished any particular goal.The degree to which you have or have not demonstrated your goals is apparent to the reader anyways, and actually will differ based on the reader.
The previous 8 chapters are designed to be a thick how-to manual by imparting stories and examples. That is to say an experiential modelling of how to create Constructive Lenses, or cross Lenses with Blocks, or at the very least demonstrate the way in which I went about it. This last section is a more directly stated manual for creating Constructive Lenses, crossing lenses with blocks, and helping catalyze the viewpoint that the world is a construction kit: Complete with tips and tricks (the first section), and including a discussion of activity organizing (the second section), and finally a reflective theoretical section.
Constructive Lens Generative Tricks
This section talks about how to make a tool/activity more open, and more of a Constructive Lens. Even if you are not trying to make a Constructive Lens per se, or an open construction kit per se, but just like the feel of open activities or the way Constructive Lenses work, it is possible to apply these techniques just to brainstorm around in the space of your tool or activity to try to find ways you would like to make your activity/tool better even without making it into a “Constructive Lens” per se.
Input/Output Pairs
Drawdio senses electrical resistance and generates a pitched sound based on what it senses. In that sense it is a synesthetic (or cross-sensory) pair: resistance to sound. Makey Makey senses resistance and outputs HID Key Presses to a computer. Taking this input/output approach, and applying it to all the tools listed in this thesis (Drawdio, Makey Makey, and the other 3 Constructive Lenses mentioned briefly at the very end of chapter 4), we can generate a table showing where these 6 Constructive Lenses fit in on the synesthetic pairs table like this:
|
Outputs ▶ Inputs▼ |
Resistance |
Sound |
Color |
HID |
Light |
Image |
|
Resistance |
|
Drawdio |
|
Makey Makey |
|
|
|
Sound |
|
|
Singing Fingers (also outputs sound) |
|
|
|
|
Color |
|
Twinkle |
|
|
|
|
|
HID |
|
|
|
|
|
|
|
Light |
|
|
|
|
|
|
|
Image |
|
|
|
|
|
Color Code |
Table 9.2. Input/Output Sensor/Actuator Matrix predicting new Constructive Lens possibilities.
This shows how tools are related, any tool in the same column has a corresponding output modality, any tool in the same row has a corresponding input modality. But what is especially useful about a table like this is its predictive ability. The above instantiation of the table predicts 36 Constructive Lens possibilities out of which only 6 have been realized, leaving 30 to be explored. But these are not all the inputs/outputs. We don’t have to limit ourselves to just the traditional human senses, we can imagine adding proprioceptive senses like muscle tension, and inner-body stimulations like transcranial direct stimulation as outputs. Further, we can see that HID is already included as an input/output. Anything that a computer can sense, and by sense I mean any API by which a computer can communicate, could be considered an input or an output because ultimately we can sense that which a computer can sense. These two tricks can easily add more inputs/outputs to the table creating a multitude of space to explore for technological Constructive Lenses.
To this day, I’m not 100% sure I understand exactly why synesthetic pairs work so well as Constructive Lenses, but it does seem like first of all they capture the imagination, just like a good lens/magnifying glass. The second part is that the thing that captures the imagination is a phenomenon that involves transforming some phenomena in the everyday world into, if designed correctly, something that a person can sense either directly or indirectly. Finally, because the “something” that was transformed is the world people live in, they are already familiar with it and have a lot of ideas about it, and it is a natural next step, especially if the support materials suggest and demonstrate it correctly, to remix the world so as to enjoy the effect of the lens in fun ways. In this way, we have almost created a trap, or what a designer would call a forcing function:
1. User becomes intrigued with “lens”
2. User multiplies lens on entire
world and sees expressive result of lens
3. User, if supported correctly by
support materials, remixes the everyday world
Synesthesia and Magnification
Exploration is readily sparked by re-presenting the world in a new way. This can be done simply be asking someone to look at the world and focus in on all the circular shapes or everything with the color green. Simply reframing the world can give rise to new observations about the contents of the world, and practices like this are common in communities like art, nature awareness, and science. However, there are limits on human sensory capabilities and a tool, such as a lens, can help overcome these limits. The reason “Lens” was chosen in the title is because a lens literally changes the way we see the world when we look through it, thus helping us re-see.
Tools like lenses are direct catalysts for re-seeing. A magnifying glass will show you details you can’t see with the naked eye, or give you a different perspective on something you think you already know. The idea of a “synesthetic lens” is actually much different than the idea of magnification. A synesthetic lens crosses sensory modalities, letting you see sound as a color, feel electrical resistance as a vibration, or hear temperature as a sound.
When trying to create a Constructive Lens, synesthetic lenses are especially useful. When someone can use a different part of their brain to explore a sensory modality, such as using their visual brain to explore sound, it gives them a new perspective on what the original modality means. One of my tricks for designing Constructive Lenses is simply to start with a synesthetic pairing, and see if I can make it fit the other design guidelines, specifically expressivity.
Attention
In design, and in life, I really can’t put enough emphasis (and attention) on attention. As a designer, I am always thinking of where my user will allocate her attention-energy. If I don’t want that attention spent on fighting with the technology part, I had better take the idea of “Low barrier to entry” very seriously.
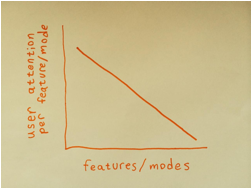
Figure 9.1. Attention per feature vs. number of features.
When it comes to Constructive Lenses, where the world is a construction kit, I really want approximately ONE mode of operation (that said, please don’t forget that we want the simple mode of operation to still produce a wide variety of possible activities). This way all of the “fighting” which now looks a lot more like “tinkering” is spent on tinkering with the world. Since that’s the explicit goal of the Constructive Lens and this thesis, it’s even more important for me to take seriously the idea that attention spent on tinkering with the environment is the main way I want the user to spend thinking-energy, intuitive-energy, and physical energy.
Along these lines here are some questions:
● For each product feature, does this product feature
directly contribute to focusing the user’s attention on re-seeing the environment?
● Does this product feature directly contribute to focusing
the user’s attention on re-making the
environment?
● For each part of my instructions and introductory videos,
does this part show people remaking and repurposing everyday objects and the
world they live in?
Opening Traditionally Closed Kits/Projects/Tools
In the last 5 years, and during the popularization of the Maker Movement and hands-on STEM education, it has become more mainstream to place value on open-ended projects. Sadly, many still do not, but at least people no longer look at you funny when you discuss it, as most have heard of it and many now value it. With a rise in interest in creative thinking, divergent activity becomes the method of choice for all but the most rudimentary skill building (and even for that). Often neglected up to this day, however, is that projects don’t just have endpoints. One must pay attention to all phases of a project, from conception, to beginning, through the middle, and even past the end into the afterlife of the project. In this way we can remember to offer projects, when appropriate, that are:
● Open Beginninged
● Open Middled
● Open Ended
● Open Epilogued
These really aren’t meant to be strict categories that your project, toolkit, or activity does or doesn’t meet the criteria of. Instead, use these categories as thinking tools in planning and designing your tool or your activity to help bring to light the various parts of the projects and how they are structured, structured differently, or not structured. Too much structure and too little structure are both detrimental to a good construction activity or construction kit. It’s all about consciously selecting the appropriate amount of structure in the appropriate places.
As discussed in chapter 4 with an extended example of Opening a Traditional LEGO kit, construction kits can either be closed or open in a number of ways.
|
Phase of Project |
What this phase means |
Meaning of Opening this Phase |
Classic Example |
Import or Export |
How to Open Example |
|
Beginning “Open Beginninged” |
Loose Materials |
People look to their everyday world and decide which materials to incorporate |
Collage |
Import |
Remove loose parts, give guidance on how to find in environment |
|
Middle “Open Middled” |
Tools that Act on Materials (sometimes Methods or ways of acting on materials) |
People look to their everyday world and decide which things can be used as tools |
Painting with Objects |
Import |
Remove tools, give guidance on how to scavenge tools |
|
End “Open Ended” |
Final Project Crystallized |
People choose their own project ending point |
Creative Writing Assignment |
n/a |
Remove convergent requirement. Guide and scaffold the participant on making meaning and choosing a unique, meaningful endpoint |
|
Epilogue “Open Epilogued” |
Placement or Afterlife of Project, the project’s “Container” |
People decide where the project shall rest or live on or be interacted with |
Graffiti |
Export |
Remove standard container. Give guidance on the space of possible containers. |
Table 9.3 Phases of a project and suggestions on how to make that phase more open.
While open construction kits are generally interesting, and open-ended projects are very important, it is not the case that you always want to open everything. An entirely open project is an absence of any project at all, which isn’t helpful for creative action. However, in a world overpopulated with very convergent products and lesson plans, advocating for how to open some phases of an activity up helps restore the balance. A project with “just the right amount” of openness is the best kind, lots of constraints so no one feels lost, but lots of openness so people can make meaningful original creative contributions.
In summary:
Balance scaffolding with openness: appropriate constraints are helpful for creative process
As seen in Chapter 4, importing and exporting are an important and simple lens to look at your toolkit with in order to open it up to other ecosystems, be they natural, human-made physical, or computational. In the computational world, this is usually called API when automated, or simply importing and exporting if non-automated.
Importing: Bringing something into the platform/tool environment that was not originally part of the platform/environment inherently
Exporting: Making the project made with the tool/platform visible and interactive and usable in places and environments beyond the scope of the tool’s environment itself.
Based on the example of opening a LEGO kit, at the beginning of Chapter 4, we can derive this list of suggestions for opening your construction kit:
|
● Import ○
Add attachment points for other objects ■
suction cups ■
eyelets ■
tape (stickiness) ○
Add Connection points for objects ■
Magnets ■
Snaps ■
Velcro ○
Add Media Importation Mechanisms ■
In the physical world, add transparent media
compartments ■
In the digital world make sounds, images, and videos
importable ●
Export ○
Add flow-through ways for your projects to live in
various physical environments ■
Floating ■
Wearable ■
Car Visor Clippable ○
Allow flow-through digital ways for your projects to
live in various media ■
Video ■
Webpage ■
PDF |
Table 9.4. List of suggestions for opening a construction kit organized by importing and exporting
Creative Platforms, What do They Consist of?
Platforms are typically a designation given to a construct upon which a number of actions can be taken. Take a gaming console like the Nintendo. This is a platform upon which many games can be built by many developers, and then further users can enjoy those games in many ways. In the non-tech world, we might think of a platform as a good theater. The term platform may literally come from a raised flat area, so a stage is etymologically a great example. In a good theater any story can transpire, it is just a venue helping to show that content. A creative platform is just like a Nintendo console or a theater with the added important part that the actions taken should be creative. Now what differentiates a platform from a tool? The simple answer is that a platform is the whole shabang while a tool is an important part of the shabang. Let’s discuss:
As holistic technology designers, it’s good to take a step back and look at the big picture every once in a while. What is it, exactly, that we are trying to do? As we design tools or products, we need to think of them in the big picture of how they are made and how they are used.
How They Are Made
What is the story behind how something is made? What was the mindstate from which it came? What are the driving motivations? Nothing is ever “pure” but everything has a story or set of possible stories, and everything has a driving force or set of driving forces. In describing how Drawdio was made, I went into great detail bothering about the context in which it evolved. Those forces had a direct impact on what it became. Going into the birth of Drawdio, I was in the Lifelong Kindergarten group whose stated goal is to “develop new technologies that, in the spirit of the blocks and fingerpaint of kindergarten, expand the range of what people can design, create, and learn.” I was running PicoCricket workshops and playing with PicoCrickets and the Scratch Sensor Board a lot. Meanwhile I was exploring my own relationship to natives, and my modern nature that surrounds me. I was situated in India, where wires and hacking electronics are more prominent, more part of the everyday culture. I was also out of my ordinary space, which allows, or forces, me to see many things with new eyes. This is the context in which the “Curious Caterpillar” which would later give rise to Drawdio was first born. Then back at Media Lab, there is a corporate sponsorship model that brought Crayola into a meeting with us, which was a design moment, a moment of pressure and focus around the Curious Caterpillar that I was working with, which provided a space and focus for me to introduce a musical pencil idea that is where Drawdio takes its name (Draw + Audio = Drawdio). Then, Drawdio was taken to a party, a Maker Faire, a fashion show, and onto a paintbrush. It became my own personal invention kit, until finally I brought it back around to the group’s theme of making tools, and turned Drawdio into an invention kit for others to use.
How They Are Used
All of this may seem irrelevant to a person looking at the final product, but I would argue that thinking about these issues is essential to any designer of such tools, and helpful and informative to users of the tools. Because what is being offered is actually so much more than a “tool.” Then what is it that’s being offered? Well I hope that I am offering my adventures in India, my awe with Natives’ relationship to nature, my experience with technology in the Lifelong Kindergarten group at MIT Media Lab, and my own enthusiasm for personally making inventions with the Drawdio. But how can all of this be wrapped up into a tiny tool? Well a little bit of it can be in the design of the tool. Instead of thinking of the “Product Specifications,” think of the “Behavior Specifications” or the “Process Specifications” or even the “Experience Specifications.” That is, don’t worry about the “processor speed” or the “number of inputs or outputs”: these are Product Specifications which describe the product itself. Instead think about the Experience Specifications.
Experience Specifications: The specific attributes you hope to see induced in the experience of the user’s reality through the process of bringing the tool, and indeed the entire creative platform, into their life.
By thinking about the Experience Specification, one can see how certain aspects of India can be folded into the product design, say by including alligator clips or hack saws or bright colors.
Parts of a Creative Platform
But even then, only a little can be put into the design itself. The truth is that a tool is not without supporting materials. Ask any marketer, and they will tell you that a tool’s success or failure can be determined by the story that is told around a tool (or product) with things like
● packaging
● commercials
● instruction booklets
And then there are more subtle driving forces behind what a marketer does, some of which are put forward, like
● outward-facing slogan,
and some of which are never offered to the public, such as the
● inward-facing slogan
This is the story that the team tells itself when it wants to make a decision. This motto then goes into the fabric of the team and inspires, or doesn’t, various direction with the product and the other supporting materials.
In the case of a Creative Platform, such as an online programming language like Scratch, other offerings are taken into account, such as
● online communities and forums with
moderators that curate a community culture
● conferences
● organized days of action/creation
● tutorial videos
● curated projects submitted by the
community
● sample projects that ship with the
product
So a “Creative Platform” starts to become much more than just a tool, it is also all the bullets above along with the tool. And further, I think you need to give people a story to buy into. Marketers already know this, but as academics, activists, or whatever kind of world changer it is that you want to be, I think we need to learn something here. You need a backstory as much as you need these other aspects to your platform. It gives people something to dream about, something to hope for. That’s where you get into offering more than just the end product, and even more than support materials and community facilitation, this is where you really get into sharing vision: both sharing
● Genesis stories
● Motivations and Hopes for the
Future
You’ll see two genesis stories here in the thesis. And I will offer some hopes at the end of the discussion.
So a good creative platform is something that people can generate a number of their own adventures or outcomes with. And the components to a creative platform can include any of the following (along with some suggestions for the form each component might take depending on the form of the platform):
|
Creative Platform Components |
Hardware |
Software |
Non-Tech |
|
Tools |
uC-based Device |
App, Webpage |
Guide Book, Ritual |
|
Loose Parts |
Peripherals, Plugins |
Images, Sounds |
Small Products or Extras to find, make, or order |
|
Places for creative work to live (Containers) |
Online photo/video gallery, Exhibits |
Online Galleries, Photo or Video Snapshots |
Enacted in the community, mailed or collected online |
|
Genesis Story and Hope Story |
TED-style Talk |
Pecha Kucha Talk |
In-Person Oration |
|
Instructions |
Printed, Webpage |
Interactive, Webpage |
In the Guide, Print, Web |
|
Example Actions |
Trading Card Style Tutorials |
20-second mini tutorials |
Short Paragraph Scenarios |
|
Sample Projects |
Text, Images, Videos |
Ship with the app |
Described Tex/Images |
|
Packaging |
Literal “Cardboard” Box |
Splash Screen, Icon |
Guide Cover |
|
Commercials |
Video |
Video |
Image |
|
Outward Facing Slogan |
Text |
Text |
Text |
|
Inward Facing Slogan |
Text |
Text |
Text |
|
Communities and Forums |
Online Forum |
Creative Community |
Meetups |
|
Conferences |
Meetups |
Online Webinar |
Natural:Enact the Ritual |
|
Organized Day of Creation |
Decentralized Meetups |
Online Meetups |
Workshop Practices |
|
Tutorials |
Video |
Text + Images |
Video |
|
Curated Projects |
Video Gallery |
Video Gallery |
Video Gallery |
|
Sample Projects |
Video Gallery |
Video Gallery |
Video Gallery |
Table 9.5. Creative Platform Component List, and suggestions for manifestation of each component depending on the medium of the creative platform
Low Floors & Other House Metaphors
My advisor has taught me that it’s important to design creative tools with a low floor. This simply means it is easy to use, which is to say a low barrier to entry to start using it. This is so important for one obvious reason, which is that many people can access use of the creative tool without a lot of time invested. But there is another reason to make things incredibly easy to use. Everyone, including experts, will have more creative freedom when they are freed from thinking about the technical details of how to operate the tool. In this way, a low floor actually leads to virtuosic creative action more readily than an equivalent tool even after expertise is established, due to the lower cognitive load. So when in doubt: simplify simplify simplify. The other advantage to a low floor is that you get a larger community thinking together about the use of the tool, and a swarm of people can think of things that a sparse population can’t.
Another principle many people talk about is a high ceiling, meaning you can use the creative tool for more and more advanced topics. This has value, but needs to be traded off sometimes to ensure the accommodation of the other aspects of the house (e.g. low floor).
My advisor also talks about wide walls. This is the concept that many different types of people can make many different types of things using the creative tool. For example, blinky bugs use coin cell batteries and LEDs to make a bug that blinks its eyes when it moves. This doesn’t have wide walls, because you can only do one thing with it. Scratch on the other hand has wide walls in the sense that you can make music, animation, games, and many other genres of creations within it.
I would like to introduce the concept of “Many Rooms.” If you want to have a good party, I always say you need different rooms so people can focus and specialize on having a good time in different ways and at different music volumes and in different lighting. So when designing a Constructive Lens, think about how it could be used by different communities and subcommunities. The MaKey MaKey kit has been adopted by gamers as well as people wanting to provide accessibility. They’re both at the party, but they’re in different rooms. It’s great if they cross over, but it helps to think about both contexts to help hone the design. Think of how your Constructive Lens could be used in
● formal and informal education settings
● in the workplace, especially for rapid prototyping
● purely for fun at home
● with special communities addressing specific problems
● as a piece to a part of another endeavor
● in performances
● with very young people or very old people
In this way you can consider the many rooms principle.
Inspirational Learning Philosophers
In Window Into my Thoughts 1.3, I list 8 inspirational learning philosophers. There are also 3 more that I have inherited from seamlessly through my lineage of working with Mitch Resnick, who worked with Seymour Papert, who worked with Jean Piaget. Here are the 11 philosophers and my briefest possible takeaway to inspire transformational tool design:
|
Learning Philosopher |
My Personal Pithy Takeaway |
Translated into Creative Tool Design Advice |
|
Eleanor Duckworth:: |
If you look carefully enough at each learner’s idea patterns, perhaps best facilitated by watching them think through a problem with some manipulatives, you will be able to see every person actually has unique and wonderful ideas almost constantly. |
When watching a user work with your prototypes, don’t try to get them to any goal, instead keep your mouth almost entirely shut and become a connoisseur of that person’s idea path / thinking path. Then use your mouth for something constructive toward the goal of revealing the learner’s idea path “What made you do that?” and “Tell me more” |
|
Rudolf Steiner |
Develop free human beings who can impart purpose and direction. Imagination, truth, responsibility, are more important than knowledge. Good teachers focus on who they are. |
In your creative tool design practice, put who you are into the tool: that’s what people want to see. Breath life from your lineage and personal inspiration into your work, you’ll be surprised how much people will learn and create with your tool as a result. |
|
Ivan Illich |
A bakery can give you bread, but a hospital can’t give you health, and a school can’t give you knowledge, these are things you do to yourself. |
What kind of learning process are you offering people? Will the tool be part of an institution or in the hands of a person, or both? Now imagine what substance (like bread or learning or health) you want the person to have. How will they truly get that substance with your tool. Can the person really use your tool to get that substance? What does the process look like and who are the actors in control? |
|
Maria Montessori |
Give people stations with manipulatives! |
In any activity or workshop, never underestimate the power of stations. In any tool design never underestimate the power of making things as tangible and manipulable as possible for the situation. |
|
John Taylor Gatto: |
The current dominant school system was designed intentionally to create industrial cogs. |
Is your creative tool not fitting in with school culture or the modern school requirements for learning plan? Maybe you should just part ways with the desire to meet those goals. |
|
Paulo Freire: |
Can we use a pedagogy of questions? Can we teach people to see the invisible repressive walls around them rather than or even better in the process of teaching them skills and knowledge? |
What questions does your creative tool offer to people to explore? How does your tool catalyze the investigation of invisible boundaries in a person’s idea of how they can navigate the world? |
|
Grace Llewellyn: |
Learning happens. Follow what makes you come alive. |
Make your tool highly action focused and allow your user to take your tool in a direction of their choosing. Give structure with open space around it. |
|
Larry Harvey |
Make real culture and creative community happen, they will come. |
Consider what changes you might make to your creative tool if you were bringing it to Burning Man. Now imagine other possible gatherings that are fanciful and that don’t exist yet that you would create in your dream of an interesting cultural experience. Now consider what changes you might make to your creative tool for people in that imagined world. |
|
Mitch Resnick |
Creative technology is truly for everyone, so lower the bar, and create the technology as a literacy: You need an inspirational literature to learn reading, and not everyone who learns to write has to be a professional writer. |
Make it easy to get started! Is it easy yet? Make it easier! It’s not about simplicity of thought, it’s about removing unnecessary annoyance and complication. How is your tool part of a literacy or fluency? How can you create that in your tool? |
|
Seymour Papert |
Focus on powerful ideas. Learn how to learn. People learn best while making things. |
Just cut straight to the most powerful idea you personally resonate with, and make a tool to engage with that. Let people learn with your tool through making something personally meaningful. |
|
Jean Piaget |
People are individuals and education should help them learn to do new things, not repeat things. People cannot have knowledge added to them from the outside, they have their own unique tree of knowledge and they attach new bits on themselves |
Your tool would be more interesting if it did not deliver any knowledge or quiz anybody. Just stop that (okay flashcards and tests do have a place in society, but they are overused so I’m pulling the other way here). Remember that the only way the learner will grow their tree of knowledge is by reaching in with their own invisible “brain hands” into their own brain and adding bits of knowledge. So it’s up to you to make that knowledge available and worthy of adding to the tree, but not to add it. Create a catalytic environment where things are bound to be run into and added to the tree. |
Table 9.6. Inspirational philosopher takeaways and suggestions
Expressivity
This is absolutely key to generating Constructive Lenses. Is the Constructive Lens an expressive medium? By which I mean, can you use it to
● generate artifacts
● perform
● make changes to the world
For example, MaKey MaKey is strong on expressivity. You can use it to make new controllers or musical instruments, which you can then perform or play upon. If you made a synesthetic lens that converted sound to electrical resistance, I don’t see how that would readily allow people to express themselves. One aspect is that people need to be able to sense the output. So converting resistance to sound takes something you can’t normally sense and changes it to something you can readily hear, as in the Drawdio. That pairing alone is not necessarily enough to produce expressivity. In the case of the Drawdio we then added alligator clips to the circuit and positioned it so that there were two sides pointing out to the world, and designed some support materials to suggest that you ought to both explore and create things with the Drawdio. Finally we workshopped it in many different scenarios. So the real measure of expressivity is whether when put in people’s hands (the tool and the support materials), they are typically catalyzed to create expressions, to express themselves.
Design In Context
My best design work happens when I design outside of a generic setting. The surrounding helps inspire me and the context creates constraints or focuses me on a specific audience. So I try to generate my initial designs outside of a lab/office setting. Drawdio was sparked in India in a setting totally foreign to my ordinary experience, in the context of a slum school. Since there were so many objects I was not familiar with I was more able to see with a beginner’s mind, and more curious as to the makeup of my surroundings. Especially until the basic concept of your Constructive Lens is formed, explore it in an inspired context separate from your daily workspace, perhaps where you imagine it being used.
Sample Project Spaces
Sample Projects Defining the Creative Space
How do you know if your Constructive Lens is expressive? In fact can you create anything at all with your Constructive Lens? You may imagine you can, but it would be a huge step forward if you can
1. propose one single example of a project (artifact, performative concept, experience) that someone could carry out using your Constructive Lens.
This first example is crucial to concretizing your Constructive Lens’ Creative Space. Now since your Constructive Lens should be generative of more than one project (in fact it ideally could produce more projects than you could predict yourself), you should add
2. a second example project as different from the first one as you can imagine, while still being compelling and evocative.
Once you have two sample projects, you now have a line of possible projects interpolating between the two. This is a huge step forward from having one project. You now have two concrete projects, and several more imagined projects in between the two, as you can probably imagine third and fourth projects that are combinations of the first two projects in various ways.
Now
3. propose one more project, a third project, so that you have more than a line, you have a project space.
I find that once I have 3 projects, all different from each other in at least a few ways, I have a huge space of possible projects that are implied by the in between space between the points.
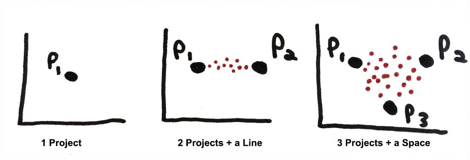 Figure 9.2.
Sample Space creation by adding one sample project (left), two sample projects
which create a line of possibilities interpolated between them (center), and
three sample projects which create a space of possibilities interpolated
between them (right).
Figure 9.2.
Sample Space creation by adding one sample project (left), two sample projects
which create a line of possibilities interpolated between them (center), and
three sample projects which create a space of possibilities interpolated
between them (right).
You can then take the results of your sample projects (depicted above as big black dots) and the other projects that these projects in the project space that these help you imagine (depicted above as small red dots) and feed them back into the design of your Constructive Lens, or creative tool design in general.
|
Sample-Project-Space-Based Tool-Design Iteration-Guide
1. Create your Tool (see entire thesis for help with this) 2. Think of a few projects you could generate with the Tool as it is 3. Think of other projects that are like these projects, or that you wish you could make, regardless of whether you can make them with this tool 4. Are all these new projects possible with the existing tool? 5. If not, what would you need to add to the tool to make them possible? If so, great, maybe you are done or keep dreaming of new projects you wish you could do. 6. Is it worth adding the new tool feature in order to get the expanded Sample Project Space? What other projects would be made possible by adding these new features (repeat cycle with new tool to find out)? Is it powerful enough in its multiplying effect on your Sample Project Space to warrant adding the complexity of the new feature (money cost and attention cost)? |
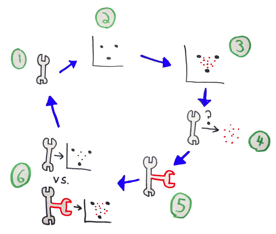
Figure 9.3. Sample-Project-Space-Based Tool-Design Iteration-Guide
Think In Sample Project Domain, optimize the tool for the User Experience
Look at step 6 from the Sample-Project-Space-Based Tool-Design Iteration-Guide. Note how there are two spaces, on the left there is a tool space, and on the right there is a Sample Project Space. Just like in Electrical Engineering, we look at audio signals in the time domain as well as in the frequency domain to get more information, and we often find the frequency domain tells us what we really want to know about sound, like which pitches it contains. It is the same with creative tool design. We must look at tools in the sample project domain in order to get a sense of what they make possible. A hammer doesn’t tell you much about what it can do to a beginner. But show a beginner a house, a bench, and garden box, and say “Want to make these?” They may want to make one of those, in which case they will say “Yes how?”, and then you give them the hammer (and nails, and wood). But if you start with the hammer, and “Want to use this?” then unless the person has experience with what a hammer can make it is pretty hard to imagine a house, bench, and garden box. So not only should you think in the Sample Project Domain so that you pick the right tool, but you also need to communicate about your tool to your participants using the Sample Project Domain.
So in the case of the Drawdio, the Drawdio Kit as displayed in Figure 5.30 which shows a picture of the tool and accessories, is not the important picture at all for explaining “Drawdio.” It is important before someone buys one and is important to know it exists, but what matters is in the Project Domain, and so the Sample Project Space as shown in the video, which is depicted in Figure 5.31 and 5.32, is the real answer to “What is Drawdio.” It’s the substance of what the Drawdio makes possible.
Likewise the Makey Makey hardware shown in Figure 6.11 is less important in terms of explaining what Makey Makey is than the Sample Project Space shown in the video depicted in Figure 6.9.
I think of the end point as the Sample Project Space (and the processes and experiences evoked by the space) enabled by the Constructive Lens. In this way you end up with a spiraling design process where each change to your Creative Tool isn’t just a change to the tool itself, but it is indirectly a change to your Sample Project Space. You can then evaluate the Sample Project Space and optimize your Constructive Lens for the most impact to a very evocative project space.
At the same time you can watch for low floors and wide walls and how they change when you make changes to the Constructive Lens. How does your Constructive Lens become more expressive, and how do different projects suggest other types of expression that would be interesting to explore? Now that you have a new Sample Project Space, go back into a new context and consider the projects for a particular population. Perhaps you should now consider a new modality for synesthesia. But how would that change the Sample Project Space? How will all these changes reflect on your presentation (e.g. your video) of the Sample Project Space to the creators in whom you hope to catalyze creative confidence? How will all this ultimately affect the way the tool is carried out in workshops and private use once it reaches the creators’ hands?
Once your Creative Tool is in the hands of people in the wild, watch and see what they do with it by looking on the web or asking people who you meet. The only real measure of how someone will use something in the wild is to observe without direct interference. Take your observations and feed them back into the next iteration of your design.
Express Your Sample Project Space
Once you have a Sample Project Space, one of the most important things you can do for the success of your Constructive Lens is to communicate it clearly. In order to do so, in the past I have made videos that show what I currently understand to be the project space (any medium will work, video is not necessary, but try to use something that is easily digestible, and I think video is the coin of the realm for today’s audience in 2014). I have examples in Figure 5.31 & 5.32, and 6.9. Based on my experience making these and other similar videos I have the following advice in general.
In your video (or other medium), show either the simplest or the most powerful idea right away. Don’t talk about it, just show it in action. This idea should stand alone as either very simple / iconic, or very powerful. This is your “lead sample project” to open up the Sample Project Space. Then show a second example. Try to build in intensity and theme so the project space just keeps looking bigger and bigger. Spend less and less time on each new example because people have learned from the previous example. By the end you should be showing multiple projects in a very short amount of time. If you have to do explanation / talking heads, then save it for the end as much as possible.
Finally, be sure to show not just the end result of the project, but also the build-up. The reason is two-fold. First, it will help ensure the creator who is watching that they can do this too because they saw how it happened. Second, the process is part of the product, because what you are “advertising” here is creative process. You don’t have to show the buildup for every project, just enough until the average viewer will follow. It’s better to lose some people in small parts of the video than to bore lots of people, so lean more to lose than bore.
Sample Project Space Gold
Once you have your Sample Project Space video (or other media), then you are done with the Sample Project Space work right? I just can’t emphasize enough how many places the Sample Project Space truly can be utilized. If it’s a software product, ship the project space as executables with the product as Scratch, Arduino, and Processing do. If you have an instruction manual online or in the box, turn it into an opportunity to give instructions in the context of more sample projects. If you have a box or a cover page, show sample projects on it. You have a creative platform on your hands, and it exists to make projects with, show them off. This is both advertising for your project, explanation and instruction for what’s going on to the user, and also artistic contribution to catalyzing the personal creative project space of people in the wild.
In 2013 I had the opportunity to design an instruction manual for Makey Makey with an intern, Sophie Diehl, the same woman who painted the World as a Construction Kit image on the front page of the thesis. We designed the instruction pamphlet shown in the Appendix Figure A.1 and A.2. The introduction column shown in FIgure A.1 does indeed show the Makey Makey and its parts. The bottom of that first column then shows a complete and most simple Makey Makey setup with no words. The next two columns are a detailed step by step walkthrough of a first-time setup, but done in the context of making Banana Bongos. So there is no lack of detail, even showing how to connect alligator clips and how to close popup windows. But the result is that you’ve just made a project by setting up your Makey Makey for the first time. The second half of the instructions in A.2 are labeled “Ideas to Get You Going.” Even this title implies that we are heading you off in your own direction, and that these ideas are just representative of a whole space of ideas which you will soon create yourself. Then there are three more instructional columns which are actually just sample projects: Fist Bump Remote Control, Cardboard Guitar Hero, and Veggie Piano. The three categories span the space of invention, game, and music, in that order, and use a diverse set of materials, human body, quarters and cardboard, and food, in that order. This diversity in genre and repurposed materials spans the space of possibilities so that people can imagine interpolating inbetween.
We also put the Sample Project Space right on the box. In our case we have an online order box and a retail shelf box. The online order box has a Sample Project Space on the back in the Appendix A.5. It shows a Cat Bowl Photo Booth, a Clay Game Controller, and a Musical Staircase. Again we highlight one example each from the categories invention, games, and music. And once again we show a diversity of materials, cats, clay, and staircases. On the retail box front in Appendix A.3 we show one single project example: a banana piano, without much explanation. When the user turns over to the back , we then show three more examples as seen in Appendix A.4, pencil game controller, water dance pads, and cat selfie cam. These four projects come from the categories of music, game, game/dance, and invention, to try to cover the diverse range of possibilities. The materials used are food, pencil, water, and cat. So in all of our packaging we make heavy use of sample projects. We do still show the tool as you can see the Makey Makey pictured in the front window of the retail box in Figure A.3 and on the back of the online box in Figure A.5.
In our case, once we put out our video, our box, our instructions, etc. essentially our entire sample space, we started to get videos of user projects emailed to us, or posted to Youtube, Twitter, etc. These projects influence our concept of the space of what is possible and allow us to output an even more diversely spanned Sample Project Space in our next round of media. Eric Rosenbaum’s project page also allows you to submit your own projects, and a selection of these projects are shown in Appendix A.6. People who come to the website can then look at the user projects and that expands and densifies the Sample Project Space we have offered even more, putting more dots farther out, and adding more dots inbetween the dots we have already put in the space, and in some cases adding dots in new dimensions. All of this is gold from a creative catalyst point of view, and from the point of view of the tool’s self-propagation.
Viewing the world permanently as a construction kit, as depicted in the cover picture, is a complex goal. Having the ability to selectively apply the viewpoint that the world is not fixed and that I can change it, is a basic requirement of civic action and is probably required to do any job well, be that raising a child, building a house, or pushing a field such as art or science. I find the number of tools and activities designed to incorporate the catalyzation of this viewpoint severely underrepresented in proportion to its importance. This thesis presents one approach to catalyzing the view that the world is a construction kit: designing tools and activity suggestions in the form of Sample Project Spaces, to form a Constructive Lens. When people in the examples I have presented use the Constructive Lenses, they exhibit repurposing behaviors that suggest they are seeing pieces of the world as components of a construction kit.
At the thesis proposal defense in 2012, one of the professors questioned the newness of the play patterns inspired by the tools I presented. She compared the behaviors to those produced by old toys like string and a ball. Though I don’t know if it was meant this way, I take this as a compliment. When someone is playing with a string or a ball, they are exploring the world they live in. What happens when I attach this string to this stick? What happens when I bounce this ball off of this wall? The play pattern that can emerge is one of playing with the rules of the world themselves rather than playing under the rules made by some other person. This beautiful form of play, playing with the designation of meaning itself, playing with the purposing of objects, situations, and activities, is the part of play/work/human-activity that is the representation of agency and original thought.
When playing with a ball, the game is not just “kickball,” the game is “let’s see how far we can kick the ball.” But after a few kicks it is “Let’s see how far we can kick the ball if it first bounces off this wall.” Then it’s “Let’s see if we can kick the ball, bounce it off the wall, and then get it stuck in that tree.” Which leads to, “How do we get the ball out of the tree?” Perhaps at this point string is brought into the scenario, and the invention process starts, “Quick tie the string to my flip flop and we can throw my shoe at the ball without getting the flipflop stuck,” or maybe something else. But the playing is playing with the rules themselves, or outside of any specific rules. The “Construction kit” in this scenario is outside of any box, it is the tree, the wall, the flip flop, and didn’t come delivered with any curriculum, and has no limits to what is “in” or “out” of the kit except those set by the imagination. Many people remember and treasure scenes like this from their childhood.
When the adoption of Drawdio and Makey Makey started getting serious, when I started seeing dads designing accessible controllers for their sons with cerebral palsy, or professional musicians performing with the tools, or when we sold more than 10,000 units in the first month of Makey Makey sales, I thought, [the following thoughts excerpted from Silver, 2012 TED Talk on Hacking Everyday Objects] “I better put a serious warning label on the box that this comes in…”
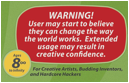
Figure 9.4. Warning from side of online Makey Makey box
I thought, “Because otherwise people are going to be getting this and turning into agents of creative change and corporations will be reinvented and governments will be crumbling and I wouldn’t have told people so,” I thought, “I’d better warn them. And I also put this little surprise when you open the lid of the box it says…”
![]()
Figure 9.5. Secret message revealed when first opening package of online Makey Makey box
I thought, “And as you start to kind of mess around with these tools I think that in some small ways you do start to see the landscape of your everyday life a little bit more like something you can express yourself with, and a little bit more like you could participate in designing the future of the way the world works.”
“So the next time you’re on an escalator and you drop an M&M by accident, maybe that’s an M&M surfboard not an escalator, so don’t pick it up right away, maybe take some more stuff out of your pockets, throw it down, maybe some chapstick or whatever. You know I used to want to design like a utopic society or a perfect world or something like that, but as I’m kind of getting older and messing with all this stuff I’m realizing that…”
“...my idea of a perfect world really can’t be designed by one person, or 100 designers, or 1,000 scientists, or even by 1,000,000 experts. It’s really going to be 7 billion pairs of hands...”
“...each following their own passions, and each — kind of like a mosaic — coming up, and creating this world in their backyards and in their kitchens and in their communities... that’s the kind of world I want to live in.”
Appendix
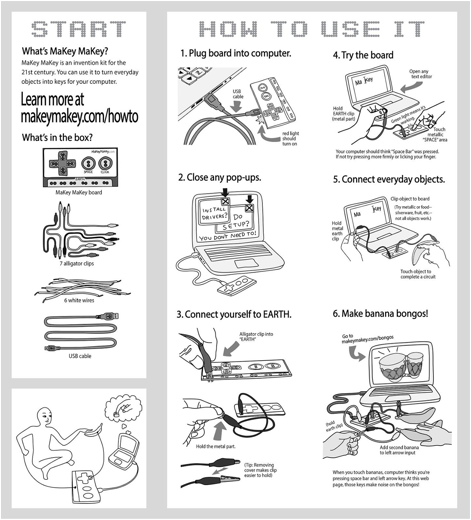
Figure A.1. Makey Makey Instruction Pamphlet Page 1. Getting Started.

Figure A.2. Makey Makey Instruction Pamphlet Page 2. Ideas to Get You Going.

Figure A.3. Makey Makey Mass Retail Box Front.
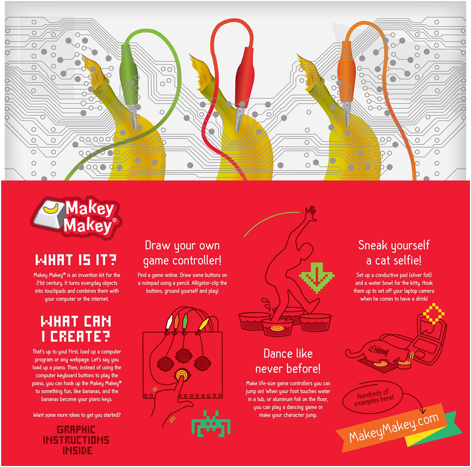
Figure A.4. Makey Makey Mass Retail Box Back.
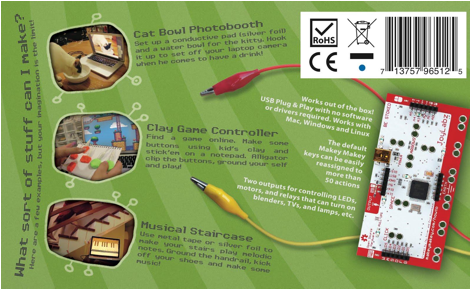
Figure A.5. Makey Makey Online Box Back.
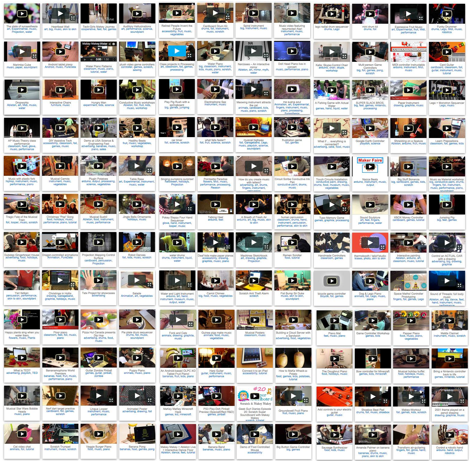
Figure A.6. Some of the projects submitted by creators to the Makey Makey website through Eric Rosenbaum’s project-tool
Thanks and Gratitude
To truly do this section justice I would have to thank almost
every person I have ever come into contact with. But let’s give it a try.
Please remind me if I forgot to add you.
·
Thanks to Mitch Resnick who is my thesis advisor in
too many ways to name. A personal hero.
·
Thanks to Jodi Silver and Oak Silver, my family.
·
Thanks to Eric Rosenbaum who collaborated with me in
various ways on all the tools mentioned in this thesis and for being an idea
energizer
·
Thanks to Neri Oxman, on my committee, for literally
transmitting confidence into my soul by her inspirational 1 on 1 talks and her
way of being.
·
Thanks to Bakhtiar, on my committee, for being living
proof that you can try out any of your ideals fearlessly.
·
Thanks to Phillip Torrone and Limor Fried for getting
me started in commercial kit making and for an eminent voice of morality and
truth in the midst of maker hardware business and hardware licensing, business
mentors and inspiration
·
Thanks to Roz Picard for showing me how to think big
and think crazy.
·
Thanks to Chris Csikszentmihalyi for teaching me
critical design and for being a punk rocker whilst within an institution.
·
Thanks to Karen Brennan for bestowing upon me the
academic allowance to unquestionably use qualitative research methods and
opening my eyes to their diversity.
·
Thanks to Amon Millner, Robbie Berg, Bakhtiar Mikhak,
and everyone at the PIE Institute for their influential work on PicoCrickets
and Scratch Board/PicoBoard and the culture that led to the creation of those
devices.
·
Thanks to Jeff Lieberman for using humor to cut
through to the reality that I can do anything.
·
Thanks to Mikey Siegel for believing I was born to
live in Santa Cruz, and for supporting me when I left
·
Thanks to my brother Beau Silver for being an
unswaying compassionate support system.
·
Thanks to my mom Louise Katz, who simply always loved
me, and encouraged my understanding of the importance of skin-to-skin contact
·
Thanks to Romie Littrell for being my friend since 3rd
grade and yet we are still doing creativity together
·
Thanks to Jessy Johnson for supporting me
·
Thanks to J.B. LaBrune for experiencing me a way of
inventing that I hadn’t felt before
·
Thanks to my dad who passed on during the writing of
this thesis, he always made space for anything to be possible, and having
worked in a supply & hardware store and never liking to buy new things,
taught me through action that you can always make something out of something
else. While I may not be very good at using a screw driver properly, I have
thoroughly learned that a screw driver can be at least 100 other things.
·
Thanks to Nicholas Negroponte for creating a space
called Media Lab where there’s nothing too big and nothing too crazy.
·
Thanks to Joi Ito for stripping some elitism out of
the Media Lab and making it a space where I feel at home top to bottom.
·
Thanks to Ron Schafer for his hard work with me when I
was an undergrad, and for believing in me and introducing me to Media Lab even
after I had given up on MIT.
·
Thanks to Magic Seth for being my partner in
imagination, and collaborating with me on uncountably many projects which
contributed to the formation of ideas in this thesis, and for actually editing
the crap out of this document for hours with me!
·
Thanks To Shani Daily for being a role model and
strong friend both at work and at home.
·
Thanks to my mastermind group, Eric Spellman, Robbie
Sigman, and Jessy Johnson, for giving me advice on how to complete my thesis.
·
Thanks to my Makey Makey company team which has
allowed me to focus some attention toward completing my thesis instead of
constantly keeping the company running: Todd Eddie, Rachel Silver, and David
ten Have
·
Thanks to Seth Frey for helping me see my own biases
·
Thanks to Evelyn for being so raw and honest
with me and herself
·
Thanks to Jay Melican for mentoring me and supporting
my progress personally, and with my thesis
·
Thanks to Brad Simpson for helping me dream
·
Thanks to Sam Cohen for drawing and co-designing
Figures 2.5 and 2.11 and contributing to ok2touch
·
Thanks to Sophie Diehl for creating the beautiful
imagery used in the cover photos and many other places such as the Makey Makey
instructions and Figure 2.23
·
Thanks to Melodie Kao for important contributions on
the design of the body of the Camera for the Invisible and the first Museum
Drawdio Paintbrush
·
Thanks to Grace Llewellyn for creating a temporary
intentional community that is a sanctuary known as Not Back to School Camp
where I tried out my crazy ideas in a supportive environment
·
Thanks to all my teachers physical and non-physical,
internal and external who literally offered me any insights that this document
contains
·
Thanks to all the undergraduate research assistants
who contributed to parts of my projects through the UROP program or otherwise
·
Thanks to all the graduate students who exchanged so
many ideas and lent so much help at so many times
·
Thanks to my family and friends for support, ideas,
and work
On Makey Makey Specifically
·
Eric Rosenbaum goes with saying is the co-inventor
·
Jim Lindblom did tons of Eagle work on the board
layout and collaborated with us on many aspects of versions 2, 3, and 4 of the
board. He is our point person at SparkFun, and an amazing engineer
(seriously!!!).
·
Arduino made one of the platforms have run on. Dave
Mellis of Arduino gave us tons of advice.
·
Mitch Resnick, our advisor, inspired how we think
about creative tool-making and how people learn.
·
Mark Feldmeier gave us ninja circuit advice.
·
Nathan Seidle from SparkFun understood the awesomeness
of this project right away and gave it a chance before it was
"pretty."
·
Leah Buechley inspired us to think differently about
microcontroller platforms.
·
Joi Ito supported this project going open source.
Changed Media Lab culture so that the students feel more empowered.
·
Robbie Sigman gave us web advice.
·
Liz Warburton First official employee. In charge of
Sales and Operations for 1+ years. Put heart and soul into early functioning of
the company. Revamped our work flow.
·
Amon Millner's ideas in the PicoBoard / Scratch Board
influenced our thinking in this project.
·
Evelyn helped us with visual design ideas.
·
Mat Cegiela helped us with visual design, concepts,
and running the Maker Faire booth
·
Sam Eberle gave us advice on video design
·
Jeff Lieberman gave us wizard advice on innumerable
things, and the confidence to believe in ourselves
·
Jodi Silver loved and supported us in 1000 ways
·
Magic Seth Raphael helped us finalize our main ideas
and gave us lots of advice
·
The Tinkering Studio at the Exploratorium helped us
build our very first prototypes and tried them out in lots of creative ways
(thanks Ryan, Luigi, Walter, Sebastian, Nicole, and everybody else!)
·
Qarly clowned the Maker Faire booth
·
Kurt ideated video and imagery
·
Shakti redigested the Kickstarter page and video
·
Amos Blanton hooked the forums up with instant skillz.
best community manager for creative sites. Sweet!
·
Tyler Williams was the tech lead on the testing code
and procedure and contributed to a faster startup time.
·
Adafruit gave us initial creative confidence by
supporting us through the Drawdio project, and PT has given key advice and
encouragement after the Kickstarter
·
Mitch Altman has given key advice and positive
encouragement
·
Mikey Siegel has discussed the project for man-weeks
worth of time and stepped in on customer support and business planning. Partner
in negotiations and high-level "what do we do now" thinking.
·
Beau Silver Has performed excellently on
banana-ma-phone with me at appearances and answered some customer questions and
created the original FAQ. Maker Faire 2013 booth lead.
·
Rachel Silver Lots of different support roles at
JoyLabz. For example, Maker Faire booth 2013 San Mateo.
·
Lilavati Eberle Gave us so much support and
encouragement
·
Not Back to School Camp Provided basic inspiration of
a temporary intentional community, energizing us to create beauty. Through
running workshops there, I had invaluable insights.
·
Keith Simmons Ongoing encouragement, and specific
feedback on the Group-How-To contest.
·
Jason Camp Teacher who tested on Chromebook for us.
·
Dave ten Have believed in the vision and is taking us
forward.
·
Todd Eddie joined the team and has laser focus to
accomplish pretty much everything.
·
Rachel Silver keeps us grounded while dreaming big
·
Thanks to Genji Leclair and Robert Ator for their
contributions to the retail packaging of Makey Makey